Genshin 6.5 Spiral Abyss Guide on May: Buffs, Boss Info & Team Comps

2026-05-15 14:27:07
Welcome back, Travelers! As we venture into the later phases of the Nod-Krai region, the Version 6.5 Spiral Abyss reset for May 2026 presents one of the most challenging combat tests to date. This guide breaks down the optimal team compositions and tactical counters to help you secure those elusive 36 stars.
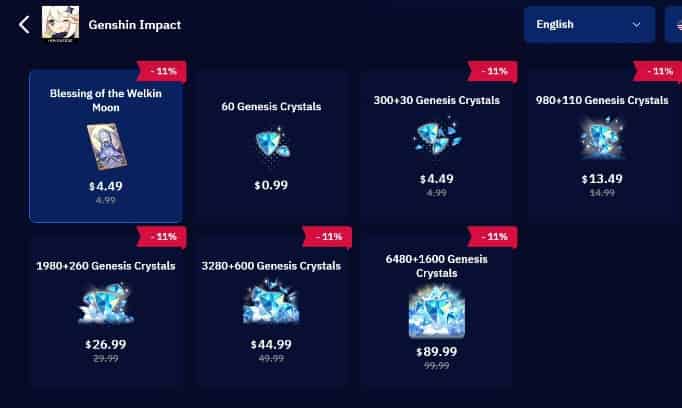
Still struggling to save up enough Primogems for your favorite characters? You aren't alone. And don't forget to visit TOPUPlive and get your genshin top up discount up to 28%!
>>Use blog code: topupliveblog<<

Blessing of the Welkin Moon

60 Genesis Crystals

300+30 Genesis Crystals

980+110 Genesis Crystals

▍Genshin 6.5 Spiral Abyss Release Date
The Genshin Impact Version 6.5 Spiral Abyss will reset on May 16, 2026. Gear up and get ready, Travelers!
▍Genshin 6.5 Spiral Abyss Buffs
1. Blessing of the Abyssal Moon
Shield-Shattering Moon: While the active character is protected by a Shield, when they deal DMG to opponents, their attacks will unleash a shockwave at the opponent's position that deals True DMG. This can trigger once every 3s.
2. Abyssal Moon Spire
First Half: All party members receive a 75% Pyro DMG Bonus.
Second Half: Lunar-Bloom DMG is increased by 75%.
▍Genshin 6.5 Spiral Abyss Boss Info
Floor 12-1
First Half: Super-Heavy Landrover: Mechanized Fortress
Second Half: Hydro Hilichurl Rogue + Lord of the Hidden Depths: Whisperer of Nightmares
First Half | |
Lv. 95 HP: 3747864 | |
Mechanics: At the start of the challenge, the Super-Heavy Landrover: Mechanized Fortress possesses high All Elemental RES. You must use Pyro ATKs to accumulate the Overheat Gauge located at the bottom of the screen to decrease its RES. | |
Second Half | |
Lv. 95 |
Lv. 95 HP: 4599652 |
Mechanics: The Hydro Hilichurl Rogue continuously applies the Wet status to characters with high-frequency Hydro attacks. It deals AoE Hydro DMG through its skills, making it easy to trigger crowd-control reactions like Electro-Charged or Frozen when paired with other elemental enemies.Lord of the Hidden Depths: Whisperer of Nightmares At the start of the battle, the Lord of the Hidden Depths: Whisperer of Nightmares is protected by an Electro Shield. | |


Floor 12-2
First Half: Fatui Electro Cicin Mage + Ruin Drake: Earthguard + Primo Geovishap
Second Half: Maha Vasudevayaputra
First Half | ||
Lv. 98 HP: 574842 |
LV. 98 HP: 1351891 |
LV. 98 HP: 3449051 |
Mechanics: To efficiently defeat these foes, prioritize shielding against the Primo Geovishap's elemental breath to counter its high damage, strike the chest core of the Ruin Drake: Earthguard to paralyze it, and stay mobile to avoid the high-frequency Electro-Charged DMG dealt by the Electro Cicin Mage's summoned insects. | ||
Second Half | ||
Lv. 98 HP: 3657161 | ||
Mechanics: At the start of the battle, Maha Vasudevayaputra begins in a Scorched state with extremely high RES. You must use Dendro attacks to fill its progress bar, restoring it to its normal state and removing the RES buff. Once restored, it will enter a Stunned state for 16 seconds; however, avoid using Pyro or Electro during this window. Using Pyro will force it back into the Scorched state, while Electro will trigger its high-attack Activated state. | ||


Floor 12-3
First Half: Hexadecatonic Mandragora
Second Half: Ruin Guard + Crab Tsar
First Half | |
LV. 100 HP: 3593809 | |
Mechanics: The Hexadecatonic Mandragora initially possesses high RES across all elements, with Dendro RES being significantly higher. Using Pyro and Electro attacks can accelerate the removal of this high RES state. Once the progress bar is depleted, it will split into 10 Spores; defeating at least 8 of them during this period will cause the boss to enter a Paralyzed state. After becoming paralyzed, it will take damage from the small spores and lose its high RES bonus. | |
Second Half | |
Lv. 100 HP: 965084 |
Lv. 100 HP: 4025384 |
Mechanics: The Ruin Guard's weak point is located at the core of its head; hitting it with Aimed Shots or Charged Attacks can cause it to enter a Paralyzed state, significantly reducing its offensive pressure. Meanwhile, the Crab Tsar begins the battle with a Void Shield (multihit shield) that must be broken quickly to avoid massive DMG and the Corrosion effect. Once the shield is shattered, it will become Paralyzed and its RES will be greatly reduced, creating your primary damage window. | |


Still don't have any meta characters to tackle the Abyss? Visit TOPUPlive—your trusted Genshin top up center—to get more resources for your pulls! Build your ultimate roster with our secure, efficient, and affordable top-up services.
>>Use blog code: topupliveblog<<
▍Genshin 6.5 Spiral Abyss Team Comps
First Half
Team 1: Mavuika/Arlecchino + Xilonen + Citlali + Kaedehara Kazuha/Bennett
Mavuika |
Xilonen |
Citlali |
Kaedehara Kazuha |
The first half strictly requires high-frequency Pyro and Electro, while also balancing Shielding and Crowd Control capabilities. Considering that the small Spores are easily dispersed by the Overloaded reaction, and the Primo Geovishap's mechanics have a relatively low threshold, the high burst DMG from Mavuika or Arlecchino can ensure a perfect clear. | |||


Team 2: Varka + Durin + Venti + Bennett/Nico
Varka |
Durin |
Venti |
Bennett |
For Anemo lineups, Varka's "Magic Guide" (Magical) system is the top choice; otherwise, any well-built team that fits the floor mechanics will suffice. | |||


Second Half
Team 1: Nefer + Lauma + Columbina + Nilou
Nefer |
Lauma |
Columbina |
Nilou |
The premier choice is undoubtedly a complete Moonbloom (Lunar Bloom) system. Combined with the Ley Line Disorder DMG buffs and its perfect alignment with the boss's shield-breaking mechanics, this team is a flawless fit. | |||


Team 2: Zibai + Illuga + Columbina + Linnea
Zibai |
Illuga |
Columbina |
Linnea |
A Moon-Crystal (Lunar Crystallize) DPS team is also viable, but you must include a Dendro character to handle the boss mechanics. Once the mechanics are cleared, you can rotate normally to finish the floor, provided the Moon-Crystal team is fully built. | |||


Team 3: Skirk + Escoffier + Furina + Mona
Skirk |
Escoffier |
Furina |
Mona |
The Skirk team operates similarly to the Zibai team. However, it may suffer from some stat-scaling losses, so a high-investment team configuration is required to ensure a stable clear. | |||


▍Conclusion
In summary, the May cycle of the 6.5 Spiral Abyss heavily rewards players who can master the newer Lunar-based elemental reactions while maintaining traditional roles like shielding and crowd control. Ultimately, flexibility is your greatest asset—ensure your teams are built to handle the specific "check" mechanics of each floor rather than relying solely on brute force. Good luck, Travelers!
▍Previous Highlights
Genshin Impact 6.6-7.3 Versions Latest Leaks
Genshin Impact Luna VII (6.6) Pull Guide: Who is the Best Pull? Nicole, Durin, Lohen, or Mavuika?
Easy 1,000 Primogems! Genshin Impact 6.5 Imaginarium Theater Lunar Mode Guide on May
Genesis Crystals Cheapest Country: Where Is Genshin Impact Top-Up the Most Affordable?
If you find yourself short on resources, you can check out TOPUPlive for Genshin Impact top up to enjoy fast and affordable discounts.
Get safe, instant, discounted top-ups with 12% off all games ( for user users) or 10% off using blog code: topupliveblog. Save now!

Nightwind Ororon
game writer
I focus on crafting guides, tips, and strategy content that truly resonates with players. Being deeply invested in Genshin Impact and Honkai: Star Rail, I love exploring every new map and character kit. I take my firsthand experience from the latest updates and turn it into simple, actionable advice to help fellow players navigate Teyvat and the Cosmos with ease.