


NTE 1.2 Tier List | Shinku & Iroi Pull Guide + Standard Select Priority

2026-07-15 15:22:29

Starting Neverness to Everness for the first time is a little like opening a loot box made of chaos. You log in, look at the character roster, and suddenly every character looks stunning with unique skills… while your Crystgin stock quickly runs dry.
So if you’re wondering who to pull, invest and who to skip in Neverness to Everness, this tier list ranks all available Espers based on: Boss raid performance, mob wave clearing capability, team synergy, operation difficulty, long-term investment value and overall meta influence.
Saving pulls for characters? Grab fast and secure Neverness to Everness top-ups via TOPUPlive and skip slow official store checkout.
【Exclusive coupon code for you: topupliveblog】



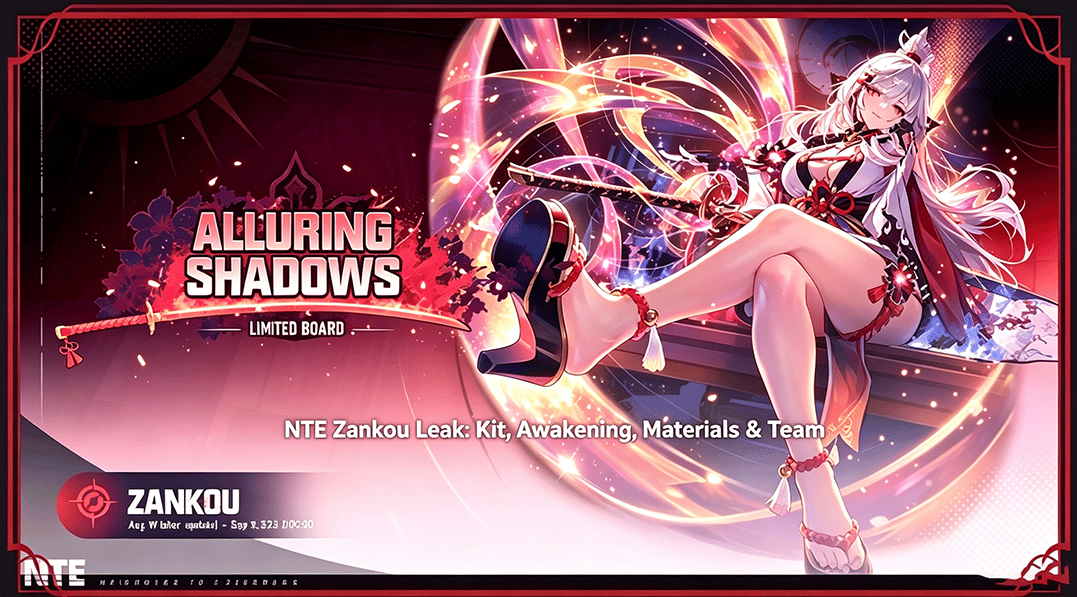
90 Draws Zankou Guaranteed

Special Selection Disc Gift Box

Long-term Capital Bundle
Elite Hunter Supplies

▍Neverness to Everness Tier List Overview
- 🔴 T0 (S+) – Highest Priority
- 🟠 T0.5 (S) – Excellent Investment
- 🟡 T1 (A) – Good for Specific Teams
- 🟢 T2 (B) – | Limited Upper Ceiling
Tier | Main DPS | Sub-DPS / Hybrid | Support / Utility |
|---|---|---|---|
🔴 T0 (S+) |
Chaos |
|
|
🟠 T0.5 (S) |
|
|
|
🟡 T1 (A) |
|
|
|
🟢 T2 (B) |
|
|
|


















This tier list evaluates every Esper with general versatility as core standard.
S+ Tier (T0) units are universal powerhouses; prioritize summoning and upgrading whenever possible.
S Tier (T0.5) are powerful system cores, perform outstandingly inside matching reaction teams.
A Tier (T1) remain usable but heavily rely on proper team composition to reach full strength.
B Tier (T2) can fill team slots in early game, yet obvious weaknesses restrict endgame performance.
Read below for detailed character analysis.
🔴 T0 – Meta Defining Characters
Game-changing Espers that shape current meta rosters, worthy of massive resource investment.
Nanally

Role: Main DPS · S·Anima Limited
Nanally remains the most well-rounded main DPS in the current version. She owns balanced sustained damage and burst damage plus built-in group stun. Her exclusive wall-climbing mechanic brings unmatched convenience during open-world traversal. She is the absolute core of Blossom reaction teams and fits many other lineups flexibly.
- Bosses: ★★★★★
- Mob Clearing: ★★★★★
- Operation Difficulty: ★★☆☆☆
Pros: Balanced damage, amazing exploration ability, beginner-friendly
Cons: Requires teammates to trigger some passive bonuses
Lacrimosa

Role: Main DPS · S·Chaos Limited
Exclusive core damage dealer for Dissonance teams. She can switch freely between melee stance and ranged stance to adapt to different combat scenarios. Her self-sufficient kit lets her operate steadily without heavy support.
- Bosses: ★★★★★
- Mob Clearing: ★★★★☆
- Operation Difficulty: ★★★☆☆
Pros: High single-target burst, flexible combat forms
Cons: Poor compatibility outside Dissonance builds
Chaos

Role: Accumulation Main DPS · S·Lakshana Limited
Core carrier for Accumulation teams, focusing on long-cycle charged strike damage. Capable of extraordinary performance in lengthy boss fights and demands practice for smooth rotation.
- Bosses: ★★★★★
- Mob Clearing: ★★★☆☆
- Operation Difficulty: ★★★★☆
Pros: Peak damage against durable bosses
Cons: Cumbersome rotation, weak wave clearing
Hotori

Role: Sub-DPS / Quick-Swap DPS · S·Cosmos Limited
The indispensable engine of Blossom system. She can record allies’ skills to unleash concentrated burst and grant huge universal ATK buffs to the whole squad. No replacement for fully optimized Blossom meta teams.
- Bosses: ★★★★☆
- Mob Clearing: ★★★★★
- Operation Difficulty: ★★☆☆☆
Pros: Powerful team buff, strong burst rotation
Cons: Value drops sharply without Blossom teammates
Esper Zero (Protagonist)

Role: Universal Flexible Enabler
Every player owns Zero from the start. Quickly generates Ring Union value to trigger elemental reactions. Good early-game filler, not recommended as permanent main damage dealer.
- Bosses: ★★★☆☆
- Mob Clearing: ★★★★☆
- Operation Difficulty: ★★☆☆☆
Iroi

Release Date: Version 1.2 Phase 2
Role: Ranged Healer / Buffer · S·Anima Limited
Excellent teammate for Shinku Accumulation comps. Deploys sheep summons to continuously heal allies and boost ATK & Crit DMG.
- Bosses: ★★★★☆
- Mob Clearing: ★★★☆☆
- Operation Difficulty: ★★☆☆☆
🟠 T0.5 – Extremely Powerful Characters
Strong reaction system cores, great investments but usually bound to specific team mechanics.
Shinku

Release Date: Version 1.2
Role: Accumulation Melee DPS · S·Cosmos Limited
New limited melee DPS in 1.2 patch. Her gameplay revolves around Fighting Spirit and Rising Crimson transformation. She relies on perfect dodge counterattacks and delivers explosive burst during enhanced state.
- Bosses: ★★★★☆
- Mob Clearing: ★★★★☆
- Operation Difficulty: ★★★★☆
Pros: High mobility, cool transformation mechanics
Cons: Limited cross-team adaptability, timing-dependent burst window
Chiz

Role: F2P Main DPS · S·Cosmos Free Max-Awakened
Zero-cost farmable carry for free-to-play hunters. Serves as budget Blossom main DPS in early & mid game.
- Bosses: ★★★★☆
- Mob Clearing: ★★★★☆
- Operation Difficulty: ★★★☆☆
Pros: No gacha needed, accessible for all players
Cons: Damage ceiling lower than limited DPS, falls off in late endgame
Hathor

Role: Melee DPS · S·Lakshana Standard Banner
Smooth combo experience with inherent damage reduction. Acts as alternative secondary DPS for Accumulation teams.
- Bosses: ★★★☆☆
- Mob Clearing: ★★★★☆
- Operation Difficulty: ★★★☆☆
Sakiri

Role: Buff Support · S·Incantation Standard Banner
Top-tier F2P-friendly support with low awakening requirements. She gathers enemies, provides massive ATK boost and minor DEF shred. Works effectively even at 0 awakening and can slot into nearly all mainstream teams.
- Bosses: ★★★★☆
- Mob Clearing: ★★★★★
- Operation Difficulty: ★☆☆☆☆
Pros: Universal buffer, cheap to raise, built-in grouping
Cons: Damage output is relatively mediocre
Jiuyuan

Role: Utility Sub-DPS / Grouping Support · S·Anima Standard Banner
Possesses the widest AoE grouping skill across all characters. She unlocks continuous self-healing after A1 awakening. Perfect flexible member for Blossom teams and your best pick if your roster lacks crowd control or survivability.
- Bosses: ★★★★☆
- Mob Clearing: ★★★★★
- Operation Difficulty: ★★★☆☆
Pros: Powerful grouping + self-sustain
Cons: Damage cannot compete with dedicated main DPS
🟡 T1 – Solid but Situational Picks
Viable options, only reach full potential inside matched compositions.
Baicang

Role: On-field Main DPS · S·Incantation Standard Banner
Dominate prolonged boss battles through continuous domain AoE damage and execute effect against low-HP foes.
- Bosses: ★★★★★
- Mob Clearing: ★★☆☆☆
- Operation Difficulty: ★★★★☆
Pros: Insane sustained boss damage
Cons: No grouping capability, highly dependent on teammates’ protection
Mint

Role: Melee DPS · S·Lakshana Standard Banner
Fun character design, yet overall damage and utility are average compared to other DPS. Better to use as casual entertainment unit.
- Bosses: ★★☆☆☆
- Mob Clearing: ★★★☆☆
- Operation Difficulty: ★★☆☆☆
Daffodil

Role: Quick-Swap Sub-DPS · S·Chaos Standard Banner
The best stagger breaker in the game. Specializes in parry mechanics and shield damage. Mostly paired with Lacrimosa Dissonance lineup.
- Bosses: ★★★★★
- Mob Clearing: ★★★☆☆
- Operation Difficulty: ★★★★☆
Pros: Unmatched stagger efficiency
Cons: High operation threshold, niche team placement
Fadia

Role: Damage Mitigation / Utility Support · S·Psyche Standard Banner
Shares incoming damage for the whole party and raises anomaly damage. The top choice for high-difficulty survival pressure content, widely used in Contagion and Dissonance teams.
- Bosses: ★★★★☆
- Mob Clearing: ★★★☆☆
- Operation Difficulty: ★★★☆☆
Pros: Unique damage sharing mechanic
Cons: Less useful against light incoming damage
Haniel

Role: ATK Buffer · A·Psyche Free Unit 【Max Awakened】
Free attack amplifier that supplies large base ATK bonus. Only shines once fully awakened, ideal support for secondary teams.
- Bosses: ★★★☆☆
- Mob Clearing: ★★★★☆
- Operation Difficulty: ★★★☆☆
Pros: Easy to obtain, strong buff after full awakening
Cons: Buff can be interrupted during casting animation
🟢 T2 – Playable but Limited Units
Suitable temporary early-game members; avoid investing massive resources.
Skia
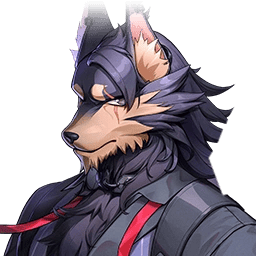
Role: Melee DPS · S·Lakshana Standard Banner
Strong crowd control and shadow transformation for damage immunity. Excellent at mob farming, insufficient damage against high-HP bosses.
- Bosses: ★★★☆☆
- Mob Clearing: ★★★★☆
- Operation Difficulty: ★★★☆☆
Aurelia

Role: Hybrid DPS
Mechanics are overly specialized. Lack competitive damage compared with higher tier attackers.
Bosses: ★★☆☆☆
Mob Clearing: ★★★☆☆
Operation Difficulty: ★★★☆☆
Adler

Role: Shield Survival Support · S·Incantation Standard Banner
Provides barrier and enemy resistance reduction. Only irreplaceable under extreme survival dungeons, generally outperformed by Fadia.
- Bosses: ★★★★☆
- Mob Clearing: ★★★☆☆
- Operation Difficulty: ★☆☆☆☆
Edgar

Role: Healer
Healing effect requires staying inside fixed area. Very awkward during mobile boss fights.
- Bosses: ★★☆☆☆
- Mob Clearing: ★★★☆☆
- Operation Difficulty: ★★★☆☆
▍Should You Pull Shinku?
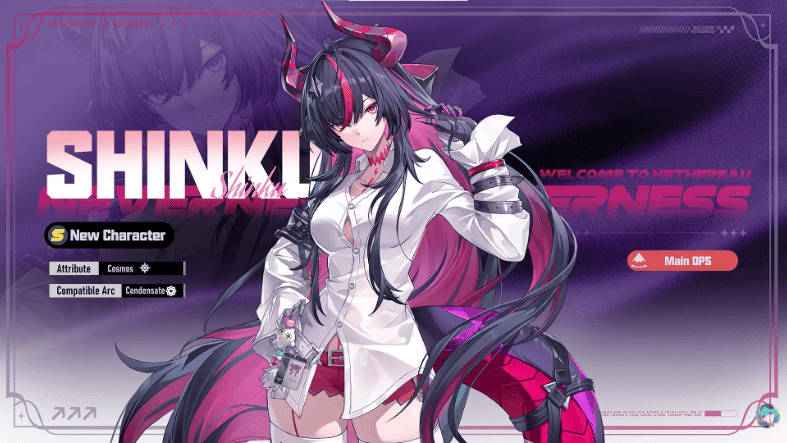
Shinku sits at 🟠 T0.5 on current tier list. She delivers distinctive fast melee gameplay and spectacular transformation burst, with clear advantages and drawbacks.
✅ Reasons to Pull
- You lack a second high-performance main DPS and plan to build competitive Accumulation team
- You love aggressive melee combat, perfect dodge counterattack mechanics
- You intend to summon Iroi in 1.2 Phase 2; Shinku + Iroi form top-tier Accumulation squad
- You are a collector and love her character design
❌ Reasons to Skip
- You already own two complete meta teams and have limited summon resources
- You prefer simple, low-operation rotations
- You want highly universal damage dealers adaptable to all teams
Pull Suggestion
F2P / Light Spenders: Only pull if you urgently need second main carry; otherwise save Crystgin for future versatile supports.
Mid & Heavy Spenders: Worth picking up to unlock independent Accumulation combat system; A1 awakening greatly improves play comfort.
Read more about her: 👉NTE Shinku Build Guide: Kit, Awakening, Materials, Arcs, Cartridge, Pull Adivce & Team
▍Should You Pull Iroi?
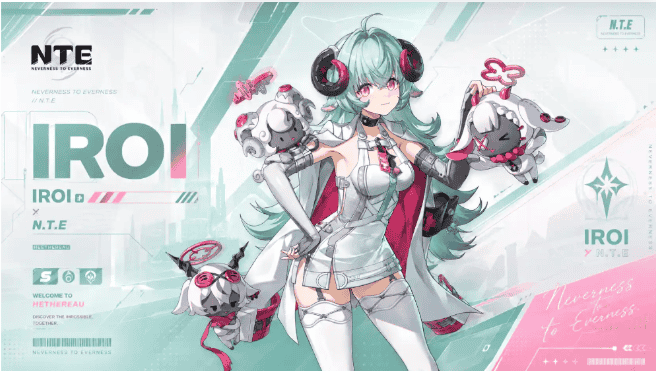
Iroi lands at 🔴 T0 on this 1.2 tier list, and her practical value lives up to this high placement thanks to rare universal healing, offensive buffs and unique party revival utility. She is the signature support designed to synergize perfectly with Shinku’s Accumulation playstyle.
✅ Reasons to Pull
- You lack a reliable dedicated healer and constantly struggle with survival in high-difficulty content
- Your roster already has solid main DPS and you want a flexible buffer that fits nearly all team builds
- You plan to summon Shinku; Iroi forms the optimal Accumulation core squad alongside her sheep sustained healing & ATK/Crit DMG buffs
- You prefer low-operation supports that require minimal field time
- You value long-term investment; versatile sustain supports retain meta viability across future patches
❌ Reasons to Skip
- You already own Fadia/other fully built survival supports and limited Crystgin reserves
- Your roster still needs multiple primary damage dealers to clear story and boss fights
- You only prioritize raw damage and have no demand for out-of-combat healing or revival mechanics
Pull Suggestion
F2P / Light Spenders: Higher priority than Shinku if you are missing strong sustain. Hold pulls only if you already have adequate defensive supports.
Mid & Heavy Spenders: Highly recommended to secure 0★ Iroi. She drastically improves team survivability for all existing DPS units. Further constellations mainly enhance healing uptime, not mandatory.
Read more about her: 👉NTE Iroi Build Guide: Kit, Awakening, Materials, Weapon, Cartridge, Pull Tips & Team
▍Standard Banner Select Priority
Ranking criteria: versatility, endgame performance, team adaptability & long-term value
Priority Order: Sakiri > Jiuyuan > Hathor > Baicang > Fadia > Mint > Daffodil
Scenario | Recommended Character | Reason |
|---|---|---|
New player / No core support |
| Top universal ATK buffer + enemy grouping, works in nearly all teams, beginner friendly |
Already own Sakiri, lack crowd control & sustain |
| Powerful AoE grouping + self-heal, core pick for Blossom teams |
Stable supports ready, need extra sub-DPS |
| Flexible off-field damage, great secondary DPS for Accumulation lineups |
Seeking durable on-field main DPS |
| Exceptional sustained damage against bosses |
Struggle with high-damage hard content |
| Unique damage sharing utility to boost team survival |
Running Dissonance teams |
| Superior stagger and shield breaking capability |





⚠️ Reminder:
Shinku & Iroi will join the standard pool after Version 1.2 limited banners conclude. Do NOT waste your permanent selector on them before their limited run ends if you aim to pull via limited banner first.
▍Conclusion
This tier list is based on Version 1.2 game data. Character strength may shift after future balance patches and new Esper releases. Tier rankings are for reference only — action gameplay heavily relies on player skill. You can clear all endgame content even using your favorite T2 characters!
If you plan to summon limited banners including Shinku and Iroi, sufficient Crystgin reserves are essential. Check TOPUPlive for secure, instant Neverness to Everness Crystgin top-up, enjoy stable delivery.

Wren Knox
game writer
I enjoy diving into game worlds, studying mechanics, and turning what I learn into helpful guides and articles. I write to make complex systems easier to understand and to help players get more enjoyment out of every game they play.
Related products
Related News

Wuthering Waves Qingxiao Team Guide: How to Play Qingxiao's Simplest Rotation Correctly
Marvel Rivals Scarlet Witch Rework: New Abilities & Season 10 Changes
Marvel Rivals Season 10 Tier List: Best Heroes to Climb After the Latest Balance Patch
ZZZ 3.2 Banner Pull Guide: Pull or Skip? The Character And W-Engine Pull Guide for You
Call of Duty: Mobile Season 8: Against All Fate, Honkai Impact 3rd Collab, New Mode, Mythic Weapons & Rewards
Arena Breakout: Infinite Season 7: UTOPIA – Release Date, Zombie Modes, New Weapons & More
PUBG Mobile V4.6 Update: Midnight Hunters, Bloodline Awakening & New Features
Stormshot Top Up Guide: How to Get Diamonds for Less