


Guia de Loadout Econômico de Arena Breakout Infinite para Iniciantes (2026)

2026-05-26 14:33:19
Novos jogadores de Arena Breakout Infinite continuam indo à falência porque usam equipamentos que não podem se dar ao luxo de perder. Uma incursão ruim — um sniper que você nunca viu, uma granada vinda do nada — acaba com todo o seu saldo bancário.
A solução é um sistema de loadout econômico que gera lucro mesmo com uma taxa de sobrevivência de 40%. Este guia abrange os kits viáveis mais baratos, o sistema de penetração de munição que a maioria dos iniciantes ignora e um caminho de progressão claro para sair da falência e alcançar a consistência.

▍Como funciona a economia em Arena Breakout Infinite
Entendendo o Koen e sua banca
Koen é a moeda do jogo que financia cada incursão. Armas, munição, armaduras, suprimentos médicos e mochilas, tudo custa Koen — e tudo o que você leva para uma incursão corre o risco de perda permanente se você morrer. Um novo jogador começa com Koen suficiente para algumas incursões econômicas, mas gastar esse fundo inicial sem um plano leva você direto para a espiral da falência.
O número principal a ser acompanhado é o seu saldo — o total de Koen disponível em seu estoque e carteira.
Regra Crucial: Nunca gaste mais de 30% do seu saldo em um único kit de incursão. Se você tiver 100 mil Koen, o custo máximo do seu kit deve ser 30 mil. Esta regra mantém você solvente durante sequências de derrotas.
A Fórmula do Lucro: Custo vs. Valor de Extração
Cada incursão é uma transação. Você investe Koen em um kit e extrai com saques que cobrem ou excedem esse investimento. A conta é simples:
Nível de Orçamento | Custo do Kit | Saque Necessário para Lucro | Taxa de Sobrevivência Necessária |
Rato (<20K) | 15-20K | 1 item razoável | ~30% |
Econômico (20-50K) | 30-50K | 2-3 itens de nível médio | ~40% |
Médio (50-100K) | 60-100K | Mochila cheia de itens valiosos | ~50% |
Chad (100K+) | 150K+ | Múltiplas eliminações + saque | ~60%+ |
Um kit de 30 mil que extrai com 60 mil em saques dobra o seu dinheiro. Um kit de 150 mil que extrai com 160 mil em saques mal cobre a reposição. Kits de menor custo têm uma margem de lucro maior e toleram taxas de sobrevivência mais baixas.
Por que kits baratos vencem a longo prazo
Considere dois jogadores ao longo de 10 incursões:
- O Jogador A utiliza 150 mil em kits com uma taxa de sobrevivência de 30%. Custo total: 1.500 mil. Extrações totais: 3 incursões × ~200 mil em saques = 600 mil. Prejuízo líquido: -900 mil.
- O Jogador B executa 30 mil kits com uma taxa de sobrevivência de 40%. Custo total: 300 mil. Extrações totais: 4 incursões × ~80 mil em saques = 320 mil. Lucro líquido: +20 mil.
O Jogador B permanece no jogo. O Jogador A vai à falência. Equipamentos econômicos não são um compromisso — eles são a estratégia matematicamente correta para construir uma banca do zero.
▍Sistema de Níveis de Munição Explicado
Níveis de Penetração e o Que Eles Significam
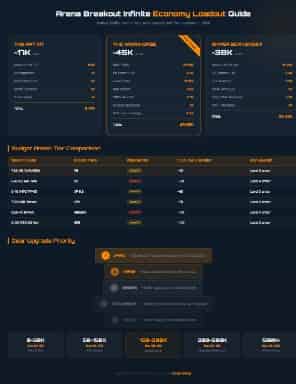
A munição em Arena Breakout Infinite possui níveis de penetração de 1 a 6. O nível de penetração determina qual armadura o projétil pode derrotar. Um projétil de Nível 3 não penetrará de forma confiável em uma armadura de Nível 4. Esta é a mecânica econômica mais importante que a maioria dos iniciantes ignora — munição barata contra uma boa armadura é dinheiro jogado fora.
Nível da Munição | Penetra Armadura | Custo Típico por Projétil | Caso de Uso |
Nível 1 | Nenhuma (apenas dano à carne) | ~50 Koen | Pistolas vs sem armadura |
Nível 2 | Armadura de Nível 1 | ~100 Koen | Incursões econômicas com pistola |
Nível 3 | Armadura de nível 2 | ~200 Koen | Incursões econômicas com SMG |
Nível 4 | Armadura de nível 3 | ~400 Koen | Incursões econômicas padrão |
Nível 5 | Armadura de nível 4 | ~800 Koen | Incursões competitivas |
Nível 6 | Armadura de nível 5+ | ~1.500 Koen | Meta de fim de jogo |
Escolhas de munição econômica para cada classe de arma
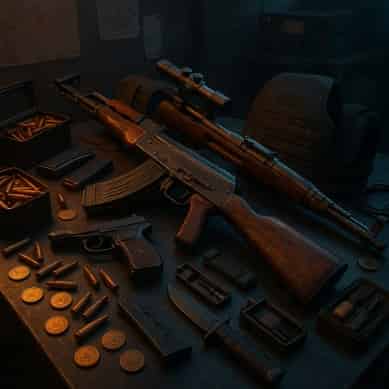
Para incursões de baixo custo, você quer munição que supere seu preço. Aqui estão os projéteis com melhor custo-benefício:
Classe de Arma | Munição Econômica | Penetração | Custo/Incursão (90 rodadas) | Notas |
7.62x39 (AKM/SKS) | PS | Nível 4 | ~8K | Melhor custo-benefício versátil |
5.45x39 (AK-74N) | BP | Nível 5 | ~12K | Penetração de Nível 5 barata |
9x39 (VSS/AS Val) | SP5 | Nível 4 | ~10K | Subsônica, silenciosa |
5.56x45 (M4A1/AK-102) | M855A1 | Nível 5 | ~15K | Caro, mas eficaz |
9x19 (MP5/PP-19) | AP 6.3 | Nível 4 | ~6K | O ponto ideal das SMGs |
7.62x54R (Mosin/SV-98) | LPS | Nível 4 | ~5K | Munição de sniper econômica |
Regra de ouro: sempre combine o nível da sua munição com a armadura que você espera enfrentar. Usar munição BP de Nível 5 em um AK-74N contra oponentes com armadura de Nível 2 é um desperdício, mas usar munição de pistola de Nível 2 contra armadura de Nível 3 é suicídio.
👇 Recarregue Koen e volte para a incursão mais rápido: Recarga de Arena Breakout Infinite no TOPUPlive
【Economize com o cupom: topupliveblog】



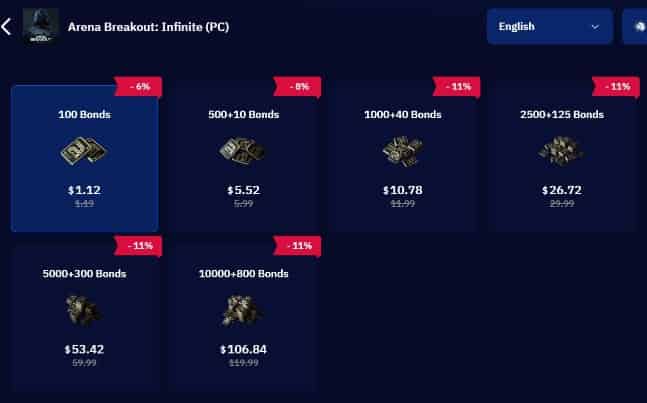
100 Bonds


Klukai Guarantee Bundle
Leva Guarantee Bundle
Sangvis Ferri Bundle
▍Três Conjuntos Iniciais por menos de 50K Koen
O Kit Rato — Por menos de 20K
O Kit de Rato é para quando sua banca está perigosamente baixa ou quando você quer missões de reconhecimento com risco zero. Você se move rápido, saqueia silenciosamente e extrai antes que alguém perceba sua presença.
Espaço | Item | Custo (Koen) |
Primária | Pistola Makarov PM ou TT | 5-8K |
Munição | 2 carregadores (24-32 projéteis) | ~1K |
Armadura | Colete PACA (Nível 2) ou nenhum | 0-5K |
Cabeça | Nenhum ou boné básico | 0K |
Mochila | Bolsa pequena de catador | 2K |
Médico | 2x Bandagem | ~1K |
Total | / | 9-17K |
Estilo de jogo: Evite todos os combates. Foque em esconderijos, saques soltos e áreas não contestadas. Se ouvir tiros, vá para o outro lado. Seu objetivo é puramente a extração — qualquer saque que você trouxer de volta é 100% de lucro, pois seu equipamento não custou quase nada.
Quando usar: banca abaixo de 50 mil, aprendendo um novo mapa ou aquecendo antes de usar equipamentos mais caros.
O Cavalo de Batalha — 30-50K
O Workhorse é o conjunto de equipamentos fundamental para lucros consistentes. Ele oferece poder de fogo suficiente para vencer combates contra oponentes com equipamentos similares e armadura suficiente para sobreviver a alguns golpes.
Espaço | Item | Custo (Koen) |
Primária | AKM ou SKS | 25-30K |
Munição | 90 munições PS (3 carregadores) | 5-8K |
Armadura | Colete Nível 3 | 10-12K |
Cabeça | Capacete SSH ou equivalente | 3-5K |
Fone de Ouvido | COM1 ou tático básico | 2-3K |
Mochila | Mochila de acampamento média | 3K |
Médico | IFAK + 2x Bandagem | 3-4K |
Total | / | 51-65K |
Nota: Em baixas do mercado, você pode montar este kit por cerca de 45 mil. Fique de olho no mercado de pulgas para ofertas de AKMs e armaduras de Nível 3.
Estilo de jogo: Lute quando tiver a vantagem — terreno elevado, melhor posicionamento ou o elemento surpresa. Evite enfrentar 'chads' com equipamentos de Nível 5+ a menos que possa flanquear ou intervir em uma luta em andamento. Priorize a extração com o saque em vez de perseguir eliminações.
Quando usar: Este é o seu kit de raid padrão assim que sua banca exceder 150 mil. Utilize-o em 70% das vezes.
O Sniper Scavenger — 35-50K
O Sniper Scavenger aproveita o potencial de abate com um único tiro da Mosin-Nagant a um custo mínimo. Você ataca à distância, saqueia o resultado e desaparece.
Espaço | Item | Custo (Koen) |
Primária | Mosin-Nagant + mira PU ou 3.5x | 15-20K |
Munição | Munição LPS × 40 | 3-4K |
Arma secundária | TT ou Makarov | 5-8K |
Armadura | Colete PACA (Nível 2) | 5K |
Mochila | Mochila pequena ou média | 2-3K |
Médico | IFAK + Bandagem | 3K |
Total | / | 33-43K |
Estilo de jogo: Posicione-se em mirantes e linhas de visão. Dê um tiro e mude de posição. Nunca avance em edifícios ou combates de curta distância (CQB) — seu fuzil de ferrolho é uma desvantagem de perto. Se derrubar um oponente, espere 30 segundos antes de saquear para evitar armadilhas.
Quando usar: Mapas com longas linhas de visão (Fazenda, Vale). Evite em mapas focados em CQB, como a Estação de TV.
▍Prioridade de Equipamento: O que Melhorar Primeiro
A Ordem de Melhoria
Quando sua banca crescer, resista ao impulso de atualizar tudo de uma vez. Siga esta ordem de prioridade:
Prioridade | Espaço de Equipamento | Por que Primeiro | Atualização Econômica |
1 | Munição | Determina se você consegue sequer causar dano a oponentes blindados | PS → BP → M80 |
2 | Armadura | Mantém você vivo o suficiente para extrair | Nível 2 → Nível 3 → Nível 4 |
3 | Arma | Melhores atributos base significam lutas mais consistentes | Pistola → Submetralhadora → Fuzil |
4 | Acessórios | Miras e empunhaduras melhoram a precisão, mas não aumentam o poder bruto | Mira de ferro → Ponto vermelho → Luneta |
5 | Médico | Mais cura = mais chances de sobrevivência | Bandagem → IFAK → Kit cirúrgico |
Munição primeiro é a regra mais contraintuitiva, porém a mais importante. Uma arma barata disparando munição boa supera uma arma cara disparando munição ruim todas as vezes. Uma AKM padrão com munição BP derrota uma armadura de Nível 4. Uma AKM totalmente modificada com munição T45 ricocheteia no Nível 3.
Quando subir de nível
Use estes limites de banca para decidir quando você ganhou o direito de usar um kit mais caro:
Banca | Custo Máximo do Kit | Nível Recomendado |
0-50K | 15K | Apenas Rat Kit |
50-150K | 30K | Kit de Rato ou Sniper Saqueador |
150-300K | 50K | Cavalo de Batalha |
300-500K | 75K | Cavalo de Batalha Melhorado (Armadura Nível 4) |
500K+ | 100K | Kits competitivos de nível médio |
Nunca pule níveis. Um jogador com 100 mil no banco usando um kit de 100 mil está a apenas uma incursão ruim da falência. Construa seu saldo com kits econômicos primeiro e, em seguida, aumente gradualmente o custo do seu kit à medida que suas reservas crescerem.
▍Dicas de Orçamento Específicas para o Mapa
Fazenda e Vale: Corridas Focadas em Saque
Fazenda e Vale são a base das incursões de baixo custo.Estes mapas têm abundantes surgimentos de saques, múltiplos pontos de extração e cobertura suficiente para evitar lutas indesejadas. Use seu Workhorse ou Rat Kit aqui. Foque em esconderijos, salas desbloqueadas e áreas distantes dos pontos de surgimento. Osite oficial do Arena Breakout Infinite possui mapas interativos com marcadores de surgimento de saques.
Arsenal e Emissora de TV: Orçamento de Combate
Estes mapas forçam confrontos em ambientes fechadosSnipers de baixo custo têm dificuldade aqui porque as linhas de visão são curtas e os combates acontecem rápido. Use uma SMG (PP-19 ou MP5) com munição AP 6.3, ou uma espingarda com balotes (slugs). Mantenha seu kit abaixo de 40K — as taxas de mortalidade são mais altas nesses mapas, então trate cada incursão como potencialmente descartável.
Zona de Confinamento: Economia Furtiva
A Zona de Confinamento restringe o que você pode trazer,o que naturalmente limita o custo do seu kit.Use isso a seu favor. Uma pistola com silenciador e munição subsônica, armadura mínima e uma mochila média é o equipamento ideal. Seu objetivo é saquear silenciosamente e realizar a extração.Ferramentas da comunidade de Arena Breakout Infinitepode ajudar você a planejar builds legais para o Lockdown.
▍Erros Comuns de Economia para Iniciantes
Erro 1: Usar Kits que Você Não Pode se Dar ao Luxo de Perder
Se perder o seu equipamento eliminasse mais de 30% da sua banca, você está jogando caro demais.Rebaixamento. A regra dos 30% existe porque sequências de derrotas acontecem com todos, até mesmo com jogadores experientes. Proteger sua banca é mais importante do que qualquer raid individual.
Erro 2: Ignorar a Penetração de Munição
Disparar munição de Nível 2 em uma armadura de Nível 4 causa zero de dano à vida do alvo.Você está literalmente jogando Koen fora. Sempre verifique o nível de penetração da sua munição antes de entrar em uma incursão. Se você não puder pagar por munição boa, mude para uma classe de arma mais barata onde a munição econômica ainda tenha um bom desempenho.
Erro 3: Investir demais em acessórios
Uma mira red dot em um AKM custa 10 mil e melhora ligeiramente a aquisição de alvos.Esses mesmos 10 mil compram 90 cartuchos de munição PS ou melhoram sua armadura do Nível 2 para o Nível 3. Acessórios são itens de luxo — compre-os apenas depois que sua munição e armadura estiverem garantidas.
Erro 4: Ignorar o Contêiner Seguro
O contêiner seguro (também chamado de "pouch") permite que você mantenha um item mesmo se morrer.Os iniciantes costumam ignorar isso, mas guardar um único item de alto valor (uma chave, um acessório raro ou um pente de munição cara) no estojo garante algum retorno em cada incursão. Use-o sempre.
▍Referência Rápida: Kit de Orçamento Completo por 45K
Espaço | Item | Custo (Koen) |
Primária | AKM (mira de ferro) | 25K |
Munição | PS × 90 munições | 5K |
Armadura | Colete Nível 3 | 10K |
Mochila | Mochila média | 3K |
Médico | IFAK + 2x Bandagem | 2K |
Total | / | 45K |
- Lucro esperado por extração bem-sucedida: 30-60K Koen
- Taxa de sobrevivência para o ponto de equilíbrio: ~35%
- Melhores mapas: Fazenda, Vale
👇 Precisa de Koen rápido? Explore as opções de recarga de Arena Breakout Infinite no TOPUPlive: topuplive.com
【Economize com o cupom: topupliveblog】
▍Perguntas Frequentes
Qual é o loadout viável mais barato em Arena Breakout Infinite?
O Kit de Rato por menos de 20 mil Koen é a opção viável mais barata.Uma pistola Makarov, um colete PACA, uma mochila pequena e bandagens oferecem o suficiente para saquear e extrair. Não vencerá tiroteios contra jogadores equipados, mas gera lucro mesmo com taxas de sobrevivência muito baixas.
Quanto Koen um iniciante deve ter antes de fazer uma incursão?
Você pode começar a fazer incursões com apenas 20 mil Koen usando o Kit Rato.No entanto, para um jogo consistente, tente manter um saldo de pelo menos 150 mil antes de usar conjuntos de nível Workhorse. Isso oferece uma margem de segurança suficiente para absorver de 3 a 4 mortes consecutivas sem ir à falência.
Vale a pena comprar armadura de Nível 4 sendo um iniciante?
Apenas se a sua banca exceder 300 mil.A armadura de Nível 4 custa cerca de 50 mil — o dobro do preço da de Nível 3 — e a melhoria na sobrevivência não justifica o custo para jogadores que ainda estão aprendendo os layouts dos mapas e pontos de extração. Continue com o Nível 3 até que sua taxa de sobrevivência ultrapasse 50%.
Que munição devo usar para raids de baixo custo?
Munições PS para armas 7.62x39 (AKM, SKS) e AP 6.3 para SMGs de 9mm são as melhores escolhas econômicas.Ambos oferecem penetração de Nível 4 a preços razoáveis. Evite totalmente a munição de Nível 2 — ela não consegue penetrar a armadura de Nível 3+ que a maioria dos oponentes usa.
Pronto para se equipar? Vá para o TOPUPlive para recargas rápidas e com descontoRecarga de Bonds de Arena Breakout e aproveite mais incursões com vantagens premium. Jogue com inteligência e extraia com segurança!
>>Comprar Títulos de Arena Breakout<<

Nightwind Ororon
game writer
I focus on crafting guides, tips, and strategy content that truly resonates with players. Being deeply invested in Genshin Impact and Honkai: Star Rail, I love exploring every new map and character kit. I take my firsthand experience from the latest updates and turn it into simple, actionable advice to help fellow players navigate Teyvat and the Cosmos with ease.
Produtos Relacionados
Notícias Relacionadas

Guia de Recarga de Tower of Saviors: Preço, Métodos e Como Obter Diamantes
Prévia da Aniimo Temporada 1 Parte 2: Novos Aniimo, Mapas, Eventos e Mais
Last War Survival Top -up: Melhor maneira de comprar pacotes, diamantes e códigos de presente
Guia de Barras de Ouro do Last War: Como Obter, Usar e Comprar Barras de Ouro com Segurança
Melhores pacotes para comprar no Last War: guia completo + onde obtê-los mais baratos
5 Melhores Centros de Recarga para Last War Survival: Onde Encontrar as Melhores Ofertas e Recargas Seguras
Guia de Marene no AFK Journey: Habilidades, Melhores Times, Build e Vale a Pena Puxar?
Prévia da Temporada 14 de Arena Breakout: Data de Lançamento da C2S0, Novo Conteúdo e Mais