


ZZZ 3.4 Sunbringer Build Guide: Best W-Engines, Drive Discs, and Teams

2026-10-27 14:11:33

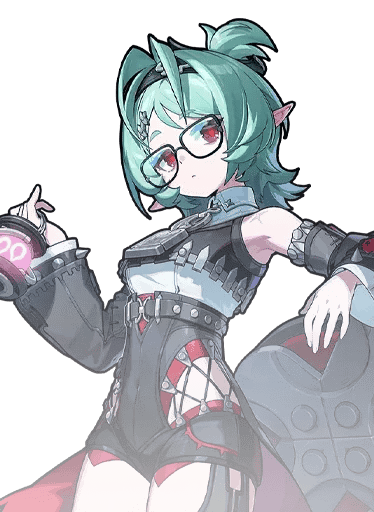
Sunbringer is an upcoming S-Rank Genesis Flare (special Fire) Armorer Agent arriving in Zenless Zone Zero Version 3.4. She is a unique three-in-one Void Hunter / Enchainer who combines Eldreda, Lindverne, and Dracaene into a single combat unit. Her damage is Sharp DMG that scales with DEF, built around Gash stacks, Maim procs, Laceration, Sharpness, and Ember Scar.
Unlike conventional Attack Agents, Sunbringer focuses on DEF-based scaling, form switching, and heavy finishers that convert critical hits into Laceration damage while consuming Gash for area effects.
For the latest rumored character release schedule, check out our 👉 Zenless Zone Zero 3.3–3.5 Banner Leak: Clarret, Roxy, Searian and Phoenix Release Predictions to plan your pulls around upcoming banners.
Need more Monochrome for Sunbringer’s Signal Search? TOPUPlive offers top up ZZZ Monochrome, including flexible packs so you can quickly prepare resources for her banner.


Inter-Knot Membership

60 Monochrome

300+30 Monochrome

1980+260 Monochrome

▍Sunbringer Overview
Sunbringer is a DEF-scaling on-field DPS whose Core Passive converts her skill damage into Sharp DMG. Critical hits replace normal CRIT DMG with Laceration DMG Bonus, and selected attacks build Gash (up to 3 stacks). Heavy finishers consume Gash to trigger Maim for extra AoE damage. Certain skills also apply Ember Scar, which her Ultimate converts into direct HP loss.
Her Additional Ability benefits from having another Stun, Defense, or Armorer Agent on the team and grants Laceration Enhance to all Armorer Agents.
Character Overview | ||
Sunbringer | Rarity |
S-Rank |
Attribute |
Wind | |
Specialty |
Armorer | |
Damage Type |
Slash | |
Faction |
Roscaelifer Greatsword | |



▍Sunbringer’s Kit
Sunbringer’s kit revolves around form switching between Eldreda (main DPS form), Lindverne (offensive support form), and Dracaene (defensive / assist form), plus these core mechanics:
- Gash & Maim: Sharp attacks build Gash stacks. Heavy attacks consume stacks to deal AoE damage and trigger Maim.
- Laceration: Critical hits convert CRIT DMG into Laceration DMG Bonus. High CRIT Rate further enhances this effect.
- Sharpness: Resource spent on enhanced EX Special Attacks.
- Ember Scar: Stacks applied by major attacks; Eldreda’s Ultimate cashes them out as direct HP damage.
- Form Switching & Assists: Perfect Dodge / Defensive Assist summons Dracaene for heavy Daze and follow-ups, while Specials switch between Eldreda and Lindverne.
Understanding these systems is more important than simply stacking ATK.
Basic Attack: Thornbreaker and Bannerbearer

Sunbringer has two Basic Attack sequences associated with Lindverne and Eldreda. Both feature four-hit combos, and their heavy fourth attacks can consume up to three Gash stacks to trigger Maim for each stack consumed.
Lindverne’s fourth attack grants invulnerability, while the third and fourth hits of both sequences provide increased interruption resistance and 40% damage reduction. Sunbringer can also use Bannerbearer – Converging Edge to switch to Eldreda and unleash an additional Genesis Flare attack when the required resource conditions are met.
Dodge
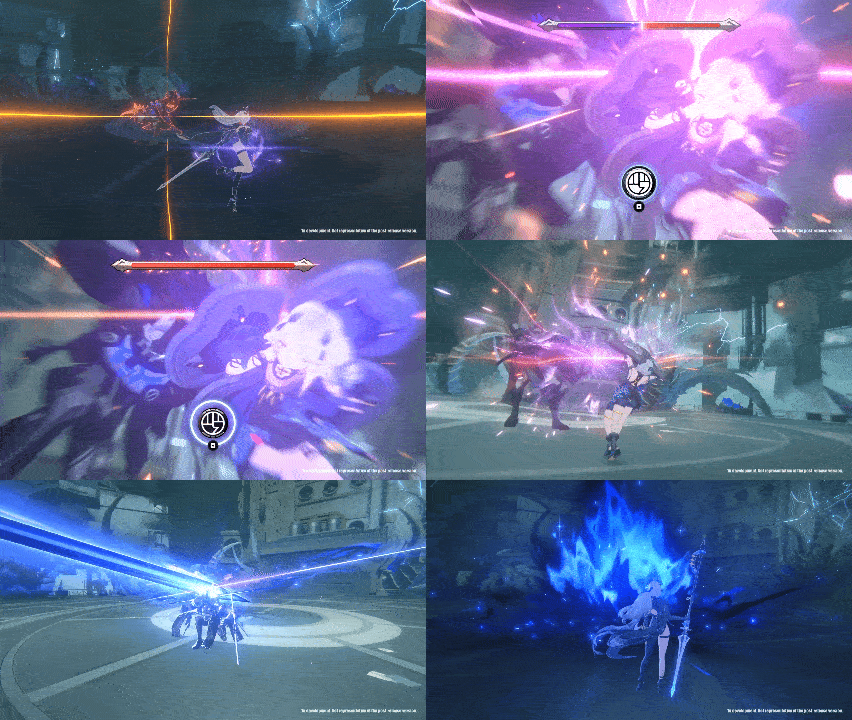
Sunbringer’s Dodge skills let Lindverne and Eldreda evade attacks with brief invulnerability. Their corresponding Dash Attacks deal Genesis Flare DMG, while Perfect Dodge triggers their respective Dodge Counters.
Eldreda also has a special movement state called Nightglide, allowing her to move while dodging and follow up with a rapid Tail Swipe. These options give Sunbringer ways to maintain offensive pressure while avoiding incoming damage.
Special Attack: Night Blaze and Kindled Lamp
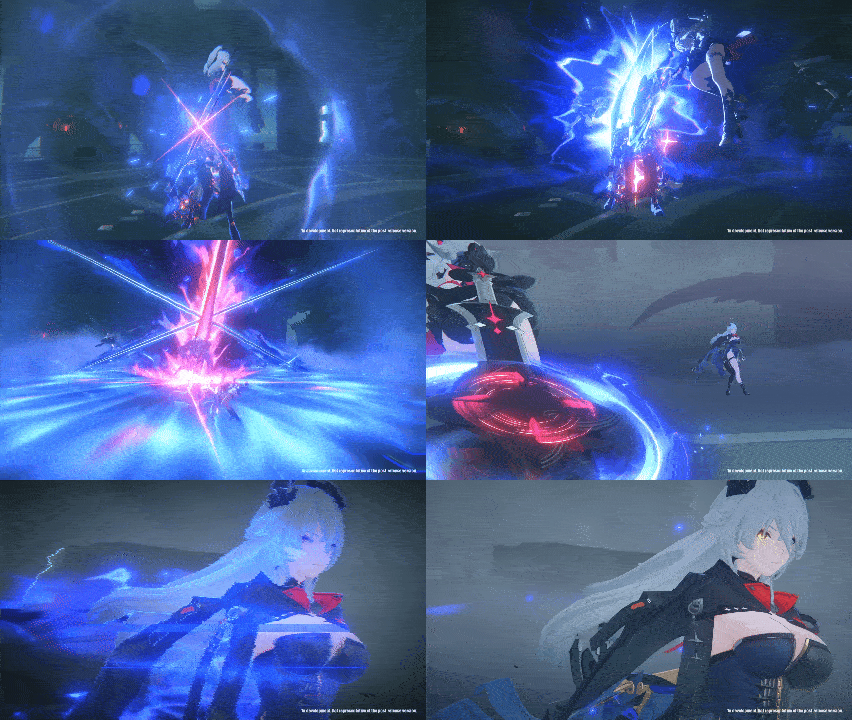
Sunbringer’s Special Attacks switch between Lindverne and Eldreda. Her EX Special Attacks consume Sharpness to unleash coordinated attacks, rather than relying solely on the conventional Energy-based EX Special loop.
Several EX Special variations can consume up to three Gash stacks and trigger Maim for each stack removed. Her higher-tier Synergy attacks deliver heavier Genesis Flare DMG, while certain follow-up versions coordinate attacks between Lindverne, Eldreda, and Dracaene. These attacks also provide invulnerability during execution.
Chain Attack
Building Dreams for All

Select Lindverne during a Chain Attack opportunity to perform a joint Genesis Flare attack with Eldreda, keeping Lindverne active. The heavy hit consumes up to three Gash stacks, triggering one Maim per stack. Grants invulnerability. Lindverne can also be selected directly when she opens a Daze Chain Attack window.
In the Name of Sunbringer

Select Eldreda during a Chain Attack opportunity to perform a joint Genesis Flare attack with Lindverne, keeping Eldreda active. The heavy hit consumes up to three Gash stacks and triggers one Maim per stack. Follow with Basic Attack Basic Attack button to enter Eldreda’s fourth hit. Grants invulnerability; Eldreda can also be selected directly when she opens a Daze Chain Attack window.
Ultimate
"Onward, Together"

At maximum Decibels, press Ultimate Ultimate button for Lindverne’s coordinated attack with Eldreda and Dracaene. Lindverne remains active. If she holds Flag Order, it is consumed and converted into Wish Core. Grants invulnerability.
"By This Wish, All Things Remade"

With Wish Core available, press Ultimate Ultimate button for Eldreda’s airborne, space-warping Genesis Flare attack. It removes enemies’ accumulated Ember Scar; the Core Passive converts that stored amount into direct HP loss when the finisher connects. Grants invulnerability.
Assist Skills
Sunbringer’s Assist kit combines offensive follow-ups from Lindverne and Eldreda with Dracaene’s defensive support. Dracaene can parry incoming attacks through Defensive Assist, inflict Daze, and perform additional counterattacks against certain enemy control skills.
Her Assist Follow-Ups also contribute to Sunbringer’s offensive setup. In particular, Dracaene’s follow-up can directly apply a Gash stack, helping prepare targets for attacks that consume Gash and trigger Maim.
▍Sunbringer’s Skill Priority
The recommended skill upgrade priority based on current beta information is:
Core Skill > Special Attack > Chain Attack > Basic Attack > Assist > Dodge
▍Sunbringer’s W-Engine
Best-in-Slot: Sunbringer’s Signature W-Engine
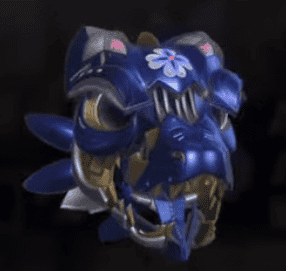
Sunbringer’s signature W-Engine is her strongest option. It provides high Base DEF, a large DEF% advanced stat, and a passive that boosts CRIT Rate while supporting her Sharp DMG and form-switching playstyle. Current beta data shows it as the clear BiS for maximizing her DEF scaling and Laceration output.
Strong Alternatives: Bloodmarrow Coffer
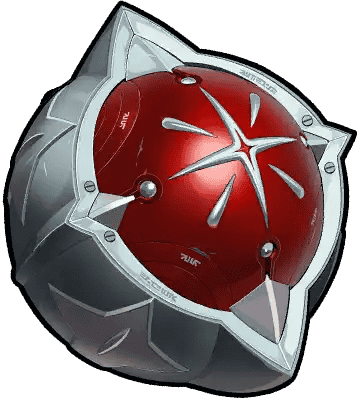
Bloodmarrow Coffer is a strong A-Rank alternative for Sunbringer, providing 20% CRIT Rate alongside its base DEF. Its passive increases DMG dealt by 0.48% for every 1% CRIT Rate above 100%, up to a maximum 24% DMG bonus at R1.
▍Sunbringer’s Drive Discs
Recommended Set: 4-Piece Version 3.4 New Set + 2-Piece Soul Rock
The new Version 3.4 Drive Disc set is currently the leading option. Its 2-piece grants DEF +16%, while the 4-piece provides CRIT Rate +12% and makes Fire Sharp DMG ignore 16% of the enemy’s DEF. Pairing it with 2-piece Soul Rock (another +16% DEF) gives a strong total DEF boost that directly scales her damage.
Alternative 2-piece

Thorned Rose if you need extra conditional CRIT Rate or damage.
Drive Disc Recommendations
Slot | Main Stat | Priority |
|---|---|---|
Disc 4 | CRIT Rate | Preferred for consistent Laceration triggers |
Disc 5 | Fire DMG Bonus / PEN Ratio | Fire DMG is the safer default |
Disc 6 | DEF% | Essential for her scaling |
▍Sunbringer’s Teams
Team 1: Sunbringer + Roxy + Robin


This is the leading team recommendation in current third-party beta coverage. Sunbringer takes the main DPS role, while Roxy and Robin provide complementary support.
The final value of this lineup will depend on their official skill effects and Sunbringer's Additional Ability conditions. If the three Agents' buffs and combat mechanics work together as expected, this composition could offer a strong offensive setup.
Team 2: Sunbringer + Norma + Robin
Character |
Sunbringer |
Norma |
|
|---|---|---|---|
Role | Main DPS | Stun | Support |

This team pairs Sunbringer with Norma and Robin to support her damage output. Sunbringer serves as the main DPS, using her DEF-scaling Sharp DMG and Gash-to-Maim mechanics to deal sustained damage. Norma and Robin provide complementary support, helping Sunbringer maintain offensive pressure and make the most of her damage windows.
A strong alternative if you already own Norma. The rotation focuses on Stun → bring Sunbringer in → generate Gash and Sharpness → consume with finishers and Ultimate.
Team 3: Sunbringer + Claret + Robin

Claret is a potential alternative to Roxy in the current team-building discussion. This lineup retains Robin's support while changing the second teammate to suit your available roster.
Before committing to this composition, verify that Claret's final role and Additional Ability interactions complement Sunbringer. The best replacement will depend on the finalized kits and the specific buffs your team needs.
▍Sunbringer’s Mindscape
Sunbringer’s core gameplay is fully available at M0, so high Mindscape investment is not required to use her effectively.
Current beta information highlights:
Mindscape | Main Effect |
|---|---|
M1 | Improves starting resources and strengthens key damage multipliers |
M2 | Enhances form-switching and combat resource efficiency |
M3 / M5 | Skill levels +2 |
M4 / M6 | Additional DEF ignore, resource ceiling, and finisher damage upgrades |
For most players the recommended order is: M0 Sunbringer → Signature W-Engine → M1/M2 rather than chasing M6 immediately. Effects remain subject to change before final release.
▍FAQs about Sunbringer
1. What role is Sunbringer in Zenless Zone Zero?
Sunbringer is an S-Rank Genesis Flare Armorer Agent and on-field DPS. Her damage scales with DEF and revolves around Sharp DMG, Gash/Maim, Laceration, and form switching between three selves.
2. Does Sunbringer need Robin?
Robin is currently one of her strongest Support partners due to shields, buffs, and synergy with her playstyle. Other Supports can work, but Robin is frequently ranked highest in current testing.
3. What stats should Sunbringer prioritize?
Start with CRIT Rate and DEF%, then build CRIT DMG / PEN Ratio and Fire DMG Bonus. ATK is less valuable because her skills scale with DEF.
4. Is Sunbringer’s M0 enough?
Yes. Her full kit and main mechanics are available at M0. M1 and M2 provide meaningful quality-of-life and damage upgrades for players who want to invest further.
▍Conclusion
Sunbringer's current beta kit makes her a distinctive DEF-scaling DPS in Zenless Zone Zero. Her leading preliminary build combines a signature Armorer W-Engine, the Version 3.4 Drive Disc set, and Soul Rock, with CRIT Rate and DEF% as her primary stat priorities.
Looking for free Polychromes and other rewards? Visit our 👉 Zenless Zone Zero Codes (October 2026): All Redeem Codes & How to Redeem guide for the latest codes and redemption instructions.
Since numbers and exact set names can still change before launch, players should verify the final version after release. For more Zenless Zone Zero build guides, material updates, top-up deals, and the latest Agent news, follow TOPUPlive.

Sana Li
game writer
I focus on writing guides, tips, and strategy content for popular games. I specialize in breaking down complex systems and economy mechanics, helping players save time and currency while staying ahead of the latest updates and limited-time events.
Related products

Related News

Top 10 SLG Games in 2026: Best Strategy Games for Mobile
ZZZ 3.4 Robin Build Guide: Best W-Engine, Drive Discs, Teams & More
Arknights: Endfield Tangtang Build Guide: Best Weapons, Gear, Skills, and Teams
Wuthering Waves Hiyuki Skin Guide: Release Date, Design, Price, and How to Get
Wuthering Waves Lily Build: Best Weapons, Echoes, Teams & Stats
Best Arena Breakout Infinite Top Up Sites: Midasbuy, BuffBuff & TOPUPlive
Best X-Clash Top Up Sites: TOPUPlive, Kaloz & LDShop Compared
Wuthering Waves Lily Materials Guide: Ascension, Skills, and Lullaby Weapon