


Wuthering Waves 3.7 Tower of Adversity Guide (Oct.20): Buffs, Enemy Info & Team Comps

2026-10-20 20:44:40
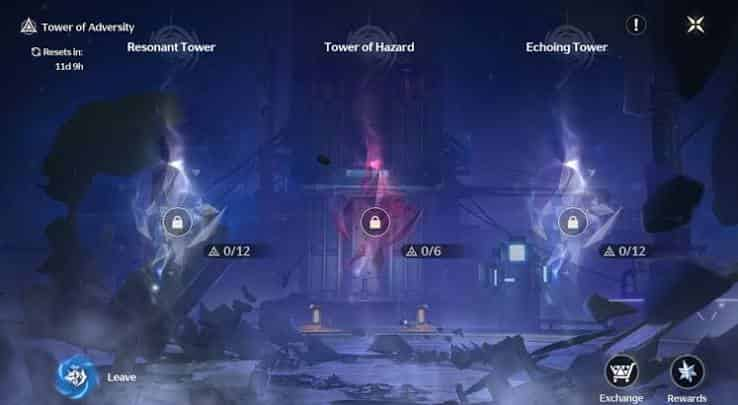
The Tower of Adversity(ToA) is one of the most important endgame modes in Wuthering Waves. Clearing its challenging floors rewards Astrite, upgrade materials, and Shell Credits, making it a key part of long-term account progression.
Rotation reminder: The Hazard Zone resets periodically, approximately every 28 days. The next reset is estimated around November 9, 2026, but always check the in-game countdown for the confirmed date and active modifiers. The Stable, Experiment, and Overdrive Zones offer permanent, one-time rewards rather than recurring cycle rewards.
▍How Tower of Adversity Works
Tower of Adversity unlocks at Union Level 15 after the required tutorial quest. It features three zones with different combat conditions and rewards.
Zone | Location | Type | Main Feature |
|---|---|---|---|
Resonant Tower | Left | Permanent | Echo Skill buffs and reduced Havoc RES |
Hazard Tower | Middle | Rotating | Changing enemy lineups and recurring rewards |
Echoing Tower | Right | Permanent | Intro Skill buffs and increased Resonance Skill DMG |


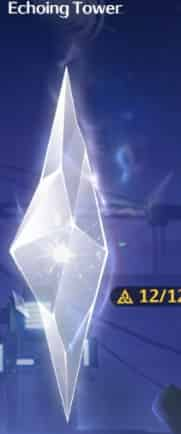
The towers share a Vigor system, so using a Resonator in one challenge can limit their availability in another. Plan your strongest teams around the hardest floors rather than using every key character early.
▍Wuwa 3.7 Resonant Tower
Current Buffs
- Enemy Havoc RES decreases by 10%.
- Casting an Echo Skill increases all Resonators' Attribute DMG by 6%, stacking up to four times.
- At four stacks, all Resonators gain 36% Crit. DMG.
- The same Resonator cannot trigger multiple stacks by using identical Echoes.
The buff favors teams that can activate Echo Skills consistently. Havoc teams also benefit from the resistance reduction.
Enemy Info
Floor | Enemy Level | Enemies |
|---|---|---|
Floor 1 | Lv. 70 | Baby Viridblaze Saurian, Viridblaze Saurian |
Floor 2 | Lv. 75 | Fusion Dreadmane, Chop Chop: Headless, Leftless, Rightless |
Floor 3 | Lv. 80 | Snip Snap, Stonewall Bracer, Fusion Warrior, Spearback |
Floor 4 | Lv. 90 | Chop Chop, Dragon of Dirge |
Recommended Teams
Team 1 — Phrolova Echo Team
Role | Main DPS | Sub-DPS | Support |
|---|---|---|---|
Resonator |
|
|
|



Team 2 — Sigrika Team
Role | Main DPS | Sub-DPS | Support |
|---|---|---|---|
Resonator |
|
|
|



Team 3 — Yangyang: Xuanling Team
Role | Main DPS | Sub-DPS | Support |
|---|---|---|---|
Resonator |
|
|
|



For higher floors, prioritize a well-built main DPS and a team that can maintain the Echo Skill stacks. Lower floors may be cleared with a solo or duo setup if your damage is sufficient, preserving Vigor for harder challenges.
If you're planning to pull for a new Resonator to strengthen your Tower of Adversity teams, check the 👉Wuthering Waves 2026 Banner Schedule before spending your Astrite. If you need more resources for upcoming Convene banners, you can top up Wuthering Waves on TOPUPlive with discounts of up to 25% OFF.


60 Lunite

6480+1600 Lunites



300+30 Lunites

980+110 Lunites

▍Wuwa 3.7 Hazard Tower Floors 1–2
Buffs
- Enemy Electro RES and Fusion RES decrease by 10%.
- Enemy Spectro RES and Glacio RES increase by 10%.
- Electro and Fusion DMG Bonus increases by 30%.
- Inflicting Negative Statuses increases Crit. DMG by 25% for 20 seconds.
Enemy Info
Floor | Enemy Level | Enemies |
|---|---|---|
Floor 1 | Lv. 100 | Lampylumen Myriad |
Floor 2 | Lv. 100 | Rocksteady Guardian, Exile Technician, Fallacy of No Return |
Recommended teams
Team 1 — Aemeath Fusion Team



Team 2 — Augusta Electro Team
Role | Main DPS | Sub-DPS | Support |
|---|---|---|---|
Resonator |
|
|
|



▍Wuwa 3.7 Hazard Tower Floors 3–4
Buffs
- After 60 seconds, enemies take an additional 5% total DMG after being hit by a Resonator's attacks. This increases by 5% every five seconds, up to 60%.
- Enemies gain 15% All-Attribute RES, except for the stated Electro and Spectro damage exceptions.
- Casting an Intro Skill increases all Resonators' total DMG by 15% for 20 seconds.
- Inflicting Electro Flare increases the triggering Resonator's total DMG by 55% for 20 seconds.
- Triggering Unison Response increases total Electro DMG by 50% for 20 seconds.
Enemy Info
Floor | Enemy Level | Enemies |
|---|---|---|
Floor 3 | Lv. 100 | Chasm Guardian, Havoc Warrior, Fractsidus Militarist, Nocturnus Knight, Impermanence Heron |
Floor 4 | Lv. 100 | Sentry Construct, Crownless |
Recommended teams
Team 1 — Jingran Team
Role | Main DPS | Sub-DPS | Support |
|---|---|---|---|
Resonator |
|
|
|



Team 2 — Hiyuki Team



Sentry Construct can be troublesome, so learn its attack patterns and avoid losing too much damage time to dodging. Since the damage bonus builds over time, surviving and maintaining consistent attacks are especially important.
▍Wuwa 3.7 Echoing Tower
Current Buffs
- Enemy Glacio RES decreases by 10%.
- Casting an Intro Skill increases the active Resonator's ATK by 5% per second, stacking up to four times.
- At maximum stacks, the Resonator gains 40% Resonance Skill DMG Bonus.
- The effect ends when that Resonator leaves the field.
This tower rewards characters who can use Intro Skills efficiently and deal meaningful damage with Resonance Skills before switching out.
Enemy Info
Floor | Enemy Level | Enemy |
|---|---|---|
Floor 1 | Lv. 70 | Aero Drake |
Floor 2 | Lv. 75 | Cyan-Feathered Heron |
Floor 3 | Lv. 80 | Hurriclaw |
Floor 4 | Lv. 90 | Fleurdelys |
Recommended Teams
Team 1 — Hiyuki Glacio Team



Team 2 — Hiyuki Alternative



Team 3 — Jingran Variant
Role | Main DPS | Sub-DPS | Support |
|---|---|---|---|
Resonator |
|
|
|


For this tower, prioritize a smooth rotation: activate Intro Skills, build the buff, and make the most of the active Resonator's Resonance Skill damage bonus before switching away.
▍Best Tower of Adversity Teams in Version 3.7
The best team is the one that matches the current modifiers and the characters you have built. Current community team lists feature several strong hypercarry and specialized lineups, including Hiyuki, Jingran, Qingxiao, and Yangyang: Xuanling teams.
Main DPS / Core | Example Team | Best Use |
|---|---|---|
| Hiyuki + Lucilla + Chisa | Glacio damage and Negative Status synergy |
| Jingran + Iuno + Shorekeeper | Flexible high-damage team |
| Sigrika + Qiuyuan + Shorekeeper | Echo Skill-oriented damage |
| Yangyang: Xuanling + Chisa + Suisui | Havoc-focused damage |
| Augusta + Iuno + Shorekeeper | Flexible damage and sustain |





These are starting points rather than mandatory teams. Adjust the lineup to match the tower's resistance changes, your available Resonators, and Vigor restrictions.
▍How to Manage Vigor and Clear More Floors
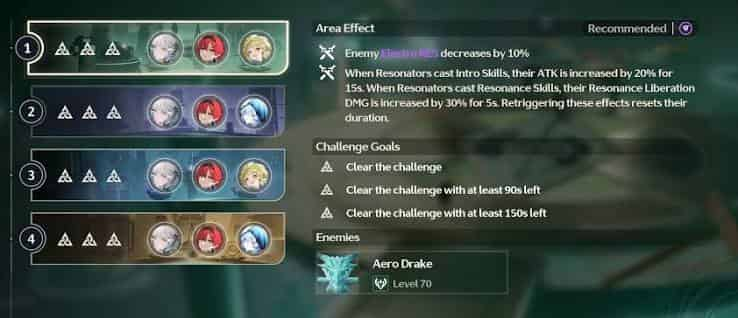
The biggest mistake is using your strongest characters on easy floors and then running out of options for the final chambers.
- Check all three towers first.
- Build backward from the hardest floors.
- Use solo or duo teams on easy floors.
- Avoid exhausting shared supports.
- Match damage to enemy resistances.
- Improve rotations before rebuilding teams.
Efficient resource planning is just as important as team building. Before purchasing premium currency, learn👉 what Lunites are and how to use them to make better spending decisions. You can also check the latest 👉Wuthering Waves Version 4.0–4.2 leaks to plan for potential future characters.

▍FAQs about WuWa 3.7 ToA
1. When does the Tower of Adversity reset?
The Hazard Zone resets approximately every 28 days. Check the in-game countdown for the exact next reset. The other zones provide permanent one-time rewards.
2. How much Astrite can Tower of Adversity give?
A full Hazard Zone clear provides approximately 800 Astrite per cycle, alongside Hazard Records, materials, and Shell Credits. Permanent zones also offer one-time Astrite rewards.
3. What Union Level unlocks Tower of Adversity?
Tower of Adversity unlocks at Union Level 15 after completing the “Alone in the Abyss” tutorial.
4. Why can't I use the same Resonator in every tower?
The towers share a Vigor system. Resonators used in one challenge may be unavailable for another, so you need to plan your teams across all three towers.
5. Which Resonators are strong for Version 3.7 Tower of Adversity?
Hiyuki, Jingran, Qingxiao, Sigrika, and Yangyang: Xuanling are among the notable main DPS options in current community team rankings. Their effectiveness depends on the tower buffs and available teammates.
▍Conclusion
For Tower of Adversity, match your teams to the buffs, save Vigor for difficult floors, and prioritize Hazard Zone before its reset. Check the in-game modifiers each cycle, since the rotating challenge—not a fixed team list—determines the best strategy.
Follow TOPUPlive for more Wuthering Waves guides, team recommendations, and update news.

Paisley Miller
game writer
I focus on writing guides, tips, and strategy content for popular games. As an active player , I enjoy exploring updates, understanding mechanics, and turning that experience into clear, practical insights for other players.

Related products

Related News

Delta Force Ammo Chart Guide: Penetration Levels, Prices, and Best Uses
AFK Journey Version 1.8.2 Update: New Heroes, Events, and Major Changes
ZZZ 3.3 New Eridu City Fund Guide: Price, Rewards, and Value
ZZZ Spooky Funhouse Tales Event Guide: Rewards, Gameplay, and Tips
League of Legends K/DA FIRESTARTER Skins: : Release Date, Champions, Prices & Showcase
Blood Strike Bunny Force Strike Pass Guide: Rewards, Cost, and Value
Blood Strike Halloween 2026: Nightmare Trial, Free Rewards & Skins
MLBB x SpongeBob Part 2 Leak: Bane "Mr. Krabs" Skin, Release Date & Effects