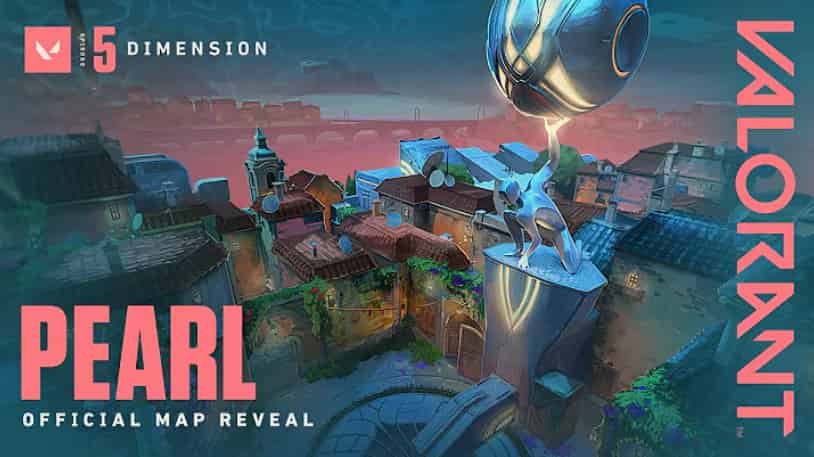
With the continued evolution of Valorant’s version updates and the formal implementation of the map rotation system, Pearl, set in an undersea city beneath Lisbon, Portugal, has once again become the focal point of competitive matches and high-rank lobbies. With its pure, symmetrical triple-lane structure and absence of dynamic mechanics, Pearl offers a more traditional and deeply strategic map experience in a game environment that often emphasizes fast pace and high mobility.
This article provides a comprehensive breakdown of Pearl’s layout, offensive and defensive dynamics, key area analysis, agent composition, and practical recommendations. Whether you’re a casual player or a tactical coach, this guide presents a clear framework for understanding this tournament-grade map.
▍Map Background and Overall Structure
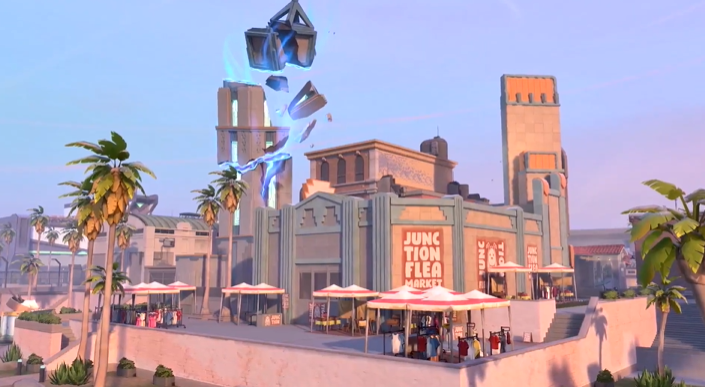
Pearl is the eighth map introduced in Valorant, officially released in 2022. It is set in the Omega Earth version of Lisbon—an underwater city. What sets Pearl apart is its lack of teleporters, elevators, or zip lines, featuring a completely symmetrical and traditional layout that emphasizes tactical positioning, information control, and coordinated execution. It is currently the only standard map in Valorant without any movement-enhancing features.
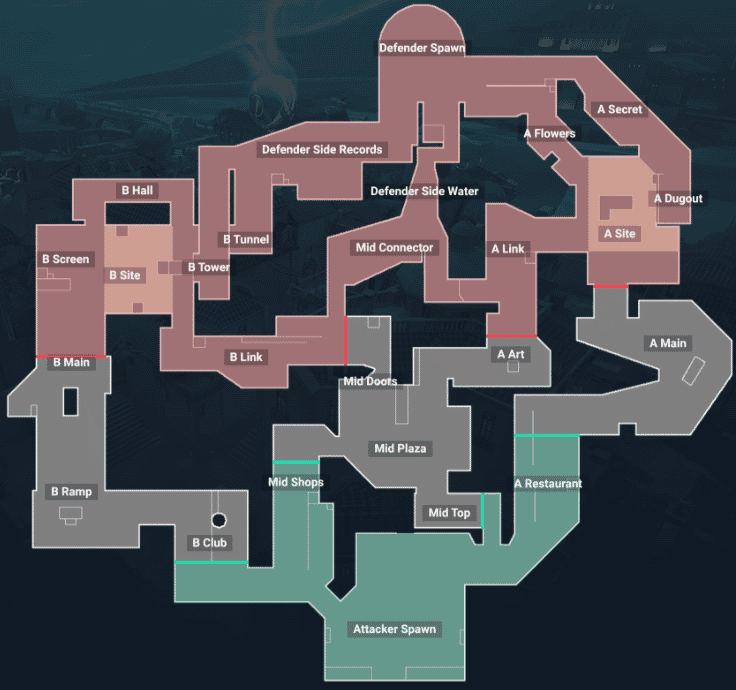
The map is structured around three primary lanes: A Site (versatile engagements), Mid (rotation and intel hub), and B Site (an open, high-impact entry zone). These zones are interlinked through multiple routes, forming a highly interactive network that demands efficient team communication, spatial control, and smart utility usage.
▍Key Area Analysis
Pearl consists of three mirrored pathways: A Site, Mid, and B Site. Each path carries complex strategic value and demands specific playstyles. Understanding the structure and flow of each zone is fundamental to mastering Pearl.
A Site – Narrow corridors and frequent angles: A counterplay battlefield
A Site is made up of zones like A Main, A Art (commonly referred to as "Gallery"), A Flowers, A Link, and A Tower. It is a tightly enclosed area with multiple access points, making it ideal for utility trades and high-pressure engagements.
A Art, the Gallery, connects Mid and A Site. This L-shaped corridor is lined with colorful artwork and littered with cover objects. It’s highly contested and often the site of early duels. Attackers must use clearing tools (e.g., Breach’s Aftershock or Fade’s Haunt) to progress safely without getting pre-fired or trapped.
A Main is the primary entry point for attackers. However, due to its openness and lack of cover, it is often subjected to smoke and delay utility from defenders. Failing to clear A Flowers and site anchors usually leads to a failed push.
A Link serves as a vital rotational route between Mid and A. If attackers pressure A Art from Mid, defenders controlling A Link can cut off the route or launch a timely retake.
Defenders frequently deploy crossfires between A Flowers and A Tower, using angle overlap and well-timed smokes to hold the choke points. With A Site being fully enclosed, ultimate abilities like Viper's Pit or Killjoy’s Lockdown are highly effective here, sometimes singlehandedly securing the round.
Mid – The central artery for rotations and intel warfare
Mid is the strategic core of Pearl. It connects A Art with B Shops, allowing transitions and splits between both bombsites. Winning control of Mid often defines round momentum.
Attackers typically use two-man pushes or recon agents (like Sova, KAY/O, or Fade) to contest Mid Plaza. Securing this area opens up fast pivots toward A Art or sneaky pressure toward B Shops, creating pincer-style attacks.
Mid Shops, which lead directly to B Link, are one of the most overlooked but valuable infiltration routes. If attackers gain control here unnoticed, they can execute a mid-to-B split that’s hard to stop.
Defenders can set traps at Mid Doors and challenge with early aggression using Omen’s teleport or Jett’s mobility. If attackers are sparse, defenders can push in and retake Mid space with confidence.
The true tactical value of Mid lies in compressing enemy decision space. Once Mid is lost, defenders are forced to retreat into site, losing map presence and reaction time.
B Site – Open angles and fast-paced engagements: A high-risk, high-reward zone
B Site sits on the right wing of the map and features a wide, L-shaped structure. Key zones include B Main, B Pillar, B Hall, and B Link. It’s the most open site in Pearl, ideal for explosive pushes—but any misstep can lead to devastating counterattacks.
Attackers usually initiate from B Main, using smokes to cut off B Hall and B Link, isolating defenders and enabling fast site entry. High-impact utility such as Breach’s Flashpoint or Raze’s grenades are essential here.
If attackers delay or fail to clear key angles, defenders can retake from elevated positions or off-angles, especially from B Hall or B Tower, quickly reversing control of the site.
Defenders are advised to focus resources on B Hall and B Link, using stall utility to delay until Mid support arrives. Killjoy’s turret or Lockdown, and Cypher’s Trapwires and Cameras, are perfect for anchoring core zones and buying precious seconds.
Notably, B Site has the longest defender rotation route—if Mid is lost and B Link compromised, it's nearly impossible to regroup for a fast retake. Thus, early information control is absolutely critical.
▍Tempo and Attacker/Defender Strategies
Pearl rewards strategic planning and deliberate tempo control. It’s neither a pure rush map nor a stall-heavy arena. Both sides must adaptively switch between control, utility usage, and repositioning.
For attackers, the general flow is to secure Mid Plaza and A Art early, probe for weakness, then collapse with pressure via Mid Shops to B Link or commit to an A Site burst.
Defenders should avoid stacking a single lane at the start. Instead, maintain flexible site setups, hold Mid info lines, and prepare for utility-heavy delays and site retakes from secondary angles like Mid Connector or A Link.
▍Agent Composition: Information and control above all
Based on tournament meta and high-rank experience, the following agent types are best suited for Pearl:
· Controller: Astra is top-tier on Pearl. Her global Star placement allows for lane-wide smokes, stuns, and gravity wells, ideal for controlling chokepoints and delaying site entries.
· Info Agents: Fade, Sova, KAY/O, Gekko are excellent at clearing space and feeding crucial intel during site execution or defensive holds.
· Entry/Disruption Agents: Raze, Breach are exceptional for breaking open close-quarters zones like A Art or B Hall with high-damage clearing tools.
· Mobility Duelists: Jett, Neon are ideal for flanking, cutting through Mid, or executing lightning-fast site rotations.
· Sentinels: Killjoy, Cypher are perfect for locking down sites and maintaining Mid control through traps, cameras, and turrets. They’re also great at delaying post-plant retakes.
▍Conclusion
Pearl is a no-frills, high-discipline tactical battleground. With no gimmicks or shortcuts, every round win must be earned through sound decision-making, precise utility, sharp aim, and seamless team coordination. It is a proving ground for both individual map knowledge and full-team tactical depth.
Need more valorant vp for those amazing skins? TOPUPlive offers a safe and discounted way to top up valorant vp! Enjoy:
✅ Official partner with secure transactions
✅ Exclusive discounts on VP packages
✅ Instant delivery to your account
✅ 24/7 customer support
Visit TOPUPlive today and upgrade your gaming experience!