Honkai Star Rail Pure Fiction 4.2 Guide: Easiest 800 Stellar Jades Guide | Best Lineups for Max Score
2026-05-12 10:00:09
Hello Trailblazers! Pure Fiction: Illusory Concepts has been updated in Honkai: Star Rail Version 4.2. In this guide, we'll bring you the full clearance strategy for Pure Fiction: Illusory Concepts of HSR Version 4.2. Let's check out the best team compositions to breeze through the challenge!
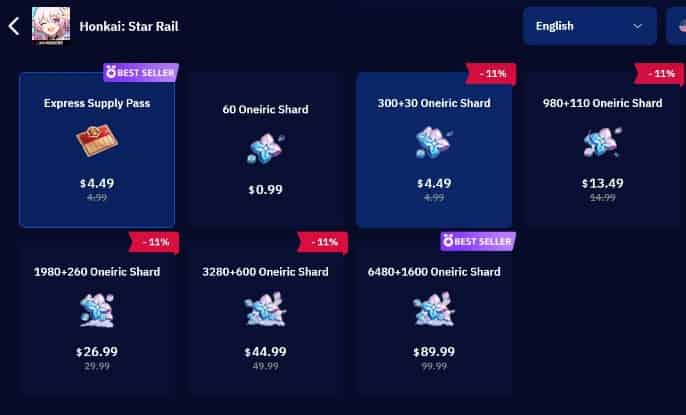
Want to pull for your favorite character faster in Honkai: Star Rail? Recharge now on TOPUPlive — enjoy up to 28% off Stellar Jade top-ups for a limited time!

Express Supply Pass
60 Oneiric Shard

300+30 Oneiric Shard

980+110 Oneiric Shard

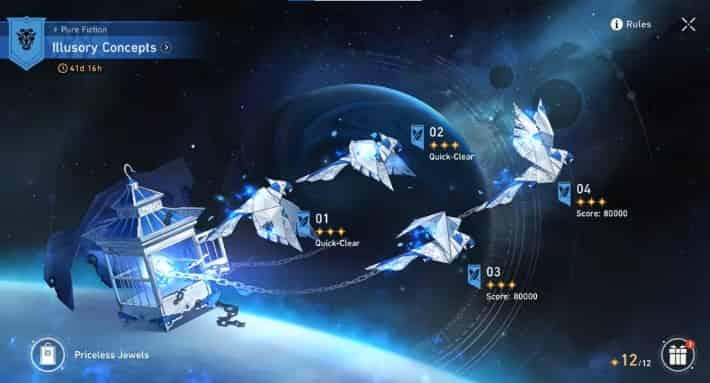
▍Honkai: Star Rail Pure Fiction 4.2 Release Date
Honkai: Star Rail Pure Fiction: Illusory Concepts Update 4.2 has officially launched as of May 11, 2026.
▍Honkai: Star Rail Pure Fiction 4.2 Stage Mechanics
1. Grit Effect
- Grit Mechanics: Activate Grit Mechanics in battle to accumulate Grit Value and enter the Surging Grit phase after filling the gauge.
- Punchline Acquisition: Each time Punchline is gained, allies additionally accumulate 2 Grit Value.
2. Concordant Truce
This stage has a special Elation Skill:
- When entering Aha Instant, deals 15 instances of Imaginary Elation DMG to a random enemy target.
- When an enemy target is defeated by any source, grants 1 Punchline point.
3. Surging Grit
Upon entering "Surging Grit":
- Aha immediately gains an extra turn, using a fixed amount of 20 Punchline (no consumption during this turn).
- Elation Skill DMG dealt is reduced to 50% of original damage.
- DMG taken by all enemy targets increases by 50%.
- Aha Instant's SPD is increased by 40.
▍Honkai: Star Rail Pure Fiction 4.2 Buffs
1. Euphoria

During "Surging Grit":
- Enemy targets take 30% more Elation DMG.
- Aha Instant's SPD is additionally increased by 20.
2. Delirium
- Base Effect: After an ally uses their Basic ATK or Skill, gain 1 Punchline. During Surging Grit, ally targets' DMG dealt increases by 50%.
- Grit Mechanics: For each enemy target hit with Basic ATK or Skill, the ally team additionally accumulates 3 Grit Value.
3. Improvisation

- Base Effect: During Surging Grit, DoT taken by enemy targets increases by 50%. When an enemy target is defeated, allies gain 1 Punchline for each DoT effect the target is afflicted with.
- Grit Mechanics: Every time a DoT is applied to an enemy target, allies additionally accumulate 1 Grit Value.
▍Honkai: Star Rail Pure Fiction 4.2 Enemy & Boss Info
Stage 4: Node 1
Wave 1
Mara-Struck Soldier+Furbo Journalist+Black Tide's Corroded
Mechanic: The Mara-Struck Soldier is a fast melee unit that deals high damage, applies Bleed, and grows stronger as allies fall. The Furbo Journalist grants +1 Punchline on death, accelerating your Grit gain to trigger Surging Grit faster, so always prioritize it. The Black Tide's Corroded applies stacking Corrosion that drains HP and reduces healing, requiring quick burst or toughness breaks to control.
Wave 2
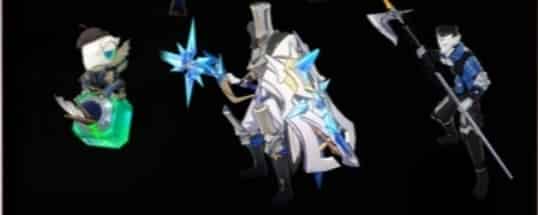
Assistant Graffiti: Rusher+Silvermane Lieutenant+Silvermane Soldier
Mechanic: This wave includes the fast, aggressive Assistant Graffiti: Rusher that applies constant pressure, the elite Silvermane Lieutenant that uses counterattacks and commands allies to focus fire, and the standard Silvermane Soldier that deals steady ranged damage. To fight them, focus the Rusher first to reduce pressure, then take out the Soldiers to cut off the Lieutenant's support, and finally burst down the Lieutenant while using shields or heals to absorb its counterattacks.
Wave 3
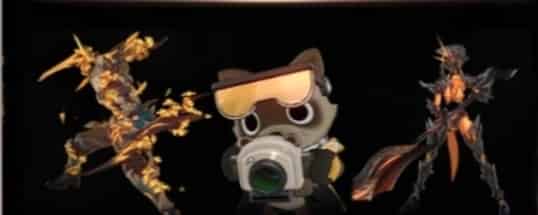
Savage God, Mad King, Incarnation of Strife (Boss)+Assistant Graffiti: Demander+Voidranger: Reaver
Mechanic: In this wave, you face the boss Savage God, Mad King, Incarnation of Strife, supported by Assistant Graffiti: Demander and Voidranger: Reaver. The boss uses layered shields that grant your team buffs when broken, and enrages if not burst down quickly. Clear the Voidranger first to disable its damage reduction, then take out the Demander to reduce pressure, and focus the boss during your Surging Grit window before it enrages.
Stage 4: Node 2
Wave 1
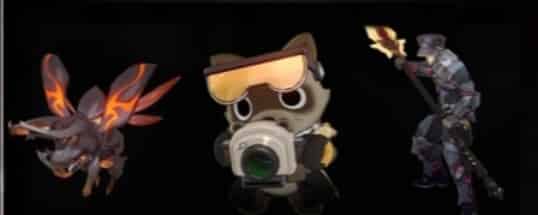
Lesser Sting+Grunt: Security Personnel+Furbo Journalist
Mechanic: This wave includes the Lesser Sting, a fast, aggressive melee unit that applies constant pressure; the Grunt: Security Personnel, which inflicts Shock DoT if killed by non-Elation damage; and the Furbo Journalist, which grants +1 Punchline on death to speed up your Surging Grit trigger. Prioritize killing the Furbo Journalist first, finish the Grunt with Elation damage to avoid debuffs, then burst down the Lesser Sting quickly.
Wave 2
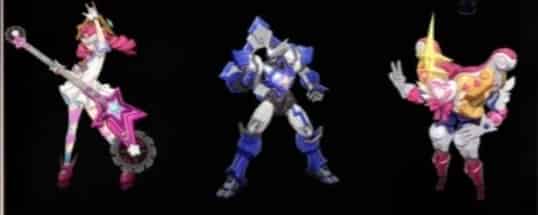
Magical Girl Troupe+Daybreak Squadron: Azurewing+Autonomous Wand
Mechanic: In this wave, you'll face the Magical Girl Troupe, which buffs allies and debuffs your team, the bulky Daybreak Squadron: Azurewing with heavy AoE attacks, and the Autonomous Wand, which heals and supports enemies. Prioritize taking out the Magical Girl and Autonomous Wand first to cut off enemy sustain, then focus fire on the Azurewing while breaking its toughness to avoid its big attacks.
Wave 3
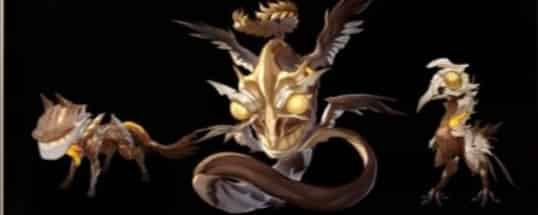
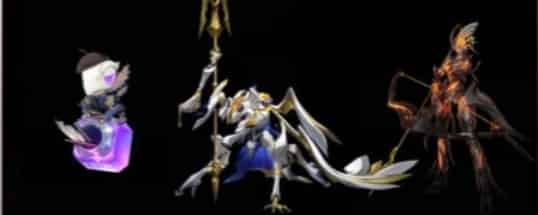
Ichor Memosprite: Judge of Oblivion (Boss)+Ichor Memosprite: Canine+Ichor Memosprite: Pheasant
Mechanic: In this wave, you face the boss Ichor Memosprite: Judge of Oblivion, supported by the Ichor Memosprite: Canine and Ichor Memosprite: Pheasant. The boss grows stronger by absorbing defeated allies, so clear the fast Canine and healing Pheasant first to cut its sustain and buffs, then burst the boss down during Surging Grit before it stacks too many buffs.
▍Honkai: Star Rail Pure Fiction 4.2 Team Comps
Stage 4: Node 1
Remembrance Team: Castorice + Evernight + Cyrene + Hyacine
Castorice |
Evernight |
Cyrene |
Hyacine | Buff Option |
|---|---|---|---|---|
Even though the Remembrance team gains almost no benefit from the stage effect, their raw strength still ensures an easy Full Star clear. The enemies have Quantum and Ice Weaknesses, perfectly matching Castorice's Quantum Type, as well as Evernight and Cyrene's Ice Type. |
Delirium | |||


The Herta Team: The Herta + Herta + Tribbie + Hyacine
The Herta |
Herta |
Tribbie |
Hyacine | Buff Option |
|---|---|---|---|---|
The enemy lineup is quite well-suited for The Herta, as Herta's frequent follow-up attacks allow The Herta to regenerate Energy rapidly. However, The Herta team's damage output falls slightly short of the Remembrance team's; running a Sustain ensures a Full Star clear but makes it difficult to achieve a full score, while going without a Sustain boosts damage but compromises survivability. |
Delirium | |||


Stage 4: Node 2
Elation Team: Silver Wolf LV.999 + Yao Guang + Sparxie/Trailblazer: Elation + Dan Heng • Permansor Terrae
Silver Wolf LV.999 |
Yao Guang |
Sparxie/Trailblazer: Elation |
Dan Heng • Permansor Terrae | Buff Option |
|---|---|---|---|---|
The enemy lineup is quite well-suited for The Herta, as Herta's frequent follow-up attacks allow The Herta to regenerate Energy rapidly. However, The Herta team's damage output falls slightly short of the Remembrance team's; running a Sustain ensures a Full Star clear but makes it difficult to achieve a full score, while going without a Sustain boosts damage but compromises survivability. |
Delirium | |||


DoT Team: Hysilens + Black Swan + Kafka + Dan Heng • Permansor Terrae
Hysilens |
Black Swan |
Kafka |
Dan Heng • Permansor Terrae | Buff Option |
|---|---|---|---|---|
The DoT team has its own exclusive sub-buffs, which are quite decent. However, the frustrating part is that the enemies only have Physical Weakness to match Hysilens; they lack Wind Weakness for Black Swan and Lightning Weakness for Kafka, so the damage output will suffer a bit. |
Improvisation | |||


If you don't have powerful characters like Castorice or Silver Wolf LV.999 yet, you can pull for them in the current Warp banners. If you are short on Stellar Jades, TOPUPlive offers a safe, reliable, and official HSR top-up platform with extremely competitive discount prices. All Trailblazers are welcome to visit!
>>Click Image to Top Up Now<<
▍Conclusion
In this phase of Pure Fiction, running Remembrance in the first half and Elation in the second half is the most effective strategy. Other team archetypes all seem to struggle to some degree. So, which teams did you use for your run? How would you rate the difficulty?
▍Previous Highlights
Honkai Star Rail 4.3 Leaks: SP Blade Kit & Banners
Honkai Star Rail Version 4.3: New Characters and Warp Guide
Honkai Star Rail 4.2 Pull Guide: Silver Wolf LV.999 or Evanescia
Honkai Star Rail Express Supply Pass: An Ultimate Guide
Want to buy more oneiric shards discount and the latest game info? TOPUPlive offers a safe and discounted way for top up hsr. Enjoy:
✅ Official partner with secure transactions
✅ Exclusive discounts on Oneiric Shards packages
✅ Instant delivery to your account
✅ 24/7 customer support
Get safe, instant, discounted top-ups with 12% off all games ( for user users) or 10% off using blog code: topupliveblog. Save now!

Nightwind Ororon
game writer
I focus on crafting guides, tips, and strategy content that truly resonates with players. Being deeply invested in Genshin Impact and Honkai: Star Rail, I love exploring every new map and character kit. I take my firsthand experience from the latest updates and turn it into simple, actionable advice to help fellow players navigate Teyvat and the Cosmos with ease.
Related products
Related News
Hidden Details in Genshin Sudden Snow PV | Snezhnaya Character Leaks & Banner Predictions You Need
Marvel Rivals New Legendary Skins Guide: Black Widow Aquatic Assassin & Daredevil Sonar Savior Are Coming!
Blood Strike June 25 Update: TDM Guide, KALA Whisper & KAG-6 Matrix Showcase
Genshin Impact 6.7 Lunar VIII | Must-See Sandrone's Mechanic Analysis & Team Building Guide
MLBB July Exquisite Collection: Helcurt "Kaiju of the Deep" Full Guide
Arena Breakout Season 6 White Nights Update Guide: New PvE Mode + Mastery System Heavily Featured!
Marvel Rivals June 25 Patch: New Black Widow & Daredevil Summer Skins + Rivals Summer Festival Guide
Wuthering Waves Top Up Not Working: Common Reasons and How to Troubleshoot