Greetings, Travelers!
Spiral Abyss Floor 12 is the last floor of the Spiral Abyss domain in Genshin Impact. Take a look at Floor 12 in Version 5.8, including the best team compositions, strong characters, enemies in each chamber, guides, and the rewards available here!
✨The banners for Ineffa and Citlali are now active. — get ready for everything has to offer! Visit TOPUPlive for up to 28% off on your game top-ups and prepare for your next adventure!

| Genshin 5.8 Spiral Abyss Floor 12 Buff
Moon of Surging Tides
When a character triggers Hydro-related reactions (including Lunar Electro-Charged Reaction), a shockwave will erupt at the enemy’s location, dealing True Damage. This effect can trigger at most once every 3 seconds.
- Upper Half: Increases Electro-Charged and Lunar Electro-Charged Reaction DMG dealt by characters by 75%.
- Lower Half: Increases Night Soul-related DMG dealt by characters to enemies by 75%.
Undoubtedly, to end battles faster, we need Electro and Hydro characters for the upper half, while the lower half calls for our Natlan "battleship" team.
| Genshin 5.8 Spiral Abyss Floor 12 Enemies
First Chamber
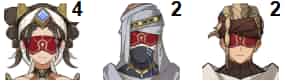
- Upper Half: Eremites
- Lower Half:
1st Wave: Fluid Avatar of Lava

2nd Wave: Gluttonous Yumkasaur Mountain King

• Has extremely high HP and periodically summons 3 Fire Pomegranates. It will swallow them one by one to unleash a finishing move, dealing massive Pyro DMG based on the number swallowed.
• Using Pyro can ignite Fire Pomegranates. Each time it swallows an ignited pomegranate, it loses 5% of its max HP. Ignited pomegranates explode, dealing heavy Pyro DMG to both sides.
• Upon entering combat in the Abyss version, it immediately unleashes a finishing move equivalent to swallowing 3 pomegranates without summoning any.
Second Chamber
- Upper Half:
1st Wave: Ruin Machines
2nd Wave: Ruin Drake: Earthguard

- Lower Half:
1st Wave: Burning-Aflame Wayob Manifestation

2nd Wave: Jadeplume Terrorshroom
• Accumulates "Activation" when hit by Electro attacks or Quicken reactions; "Activation" decreases when hit by Pyro. When "Activation" is full, it enters an Active State, attacking more fiercely until exhausted.
• If not in Active State and set ablaze by Pyro, it becomes scorched, spreading spores to spawn fungi to escape this state.
Third Chamber
- Upper Half: The Last Survivor of Tenochtzitoc

• Creates 3 hats, hiding its true form under one, and shuffles them quickly. If the real hat takes Electro-Charged or Lunar Electro-Charged Reaction DMG, shuffling pauses.
• Hats have 40% HP, with drastically increased resistance to all elements except Hydro/Electro. They take +300% Electro-Charged and Lunar Electro-Charged Reaction DMG.
• Defeating the real hat paralyzes it (massively reducing all resistances), and Electro-Charged/Lunar Electro-Charged Reaction DMG efficiency against it skyrockets.
• While paralyzed, it loses HP—the more Hydro/Electro DMG or Electro-Charged/Lunar Electro-Charged Reaction DMG the hat takes, the more HP it loses.
- Lower Half: Secret Source Automaton: Configuration Device

• In normal state, all resistances increase to 60% (20% higher than Saint Quarry enemies).
• After 40s in normal state, it unleashes a finishing move; using Night Soul abilities triggers this early. The finishing move creates Solid Combustion Pillars.
• Climb the pillars and attack their two cores to make it lose 15% HP and drastically reduce all resistances.
| Genshin 5.8 Spiral Abyss Floor 12 Best Team Comps
Best Teams (Clear All Floors)

Upper Half: Ineffa-Centered Team

Ineffa + Neuvillette + Furina + Kazuha
Ineffa, as the core and initiator of Lunar Electro-Charged Reactions, is indispensable in this Abyss. Her Elemental Skill and Burst deal off-field Electro DMG, generate a shield for survival, and create thunder clouds to convert Electro-Charged DMG into Lunar Electro-Charged Reaction DMG—massively boosting team output and countering boss mechanics.
Neuvillette, the team's main DPS, relies on Charged Attacks and Elemental Burst for core damage. His DMG scales with max HP; his wide-range Charged Attacks have high multipliers, excelling against both crowds and single targets. He also rapidly fluctuates HP to help Furina stack buffs.
Furina plays a key supportive role with DMG boosts. Her Burst provides massive Hydro DMG buffs based on teammates'HP changes. Her Elemental Skill generates energy particles for team energy recharge, adds off-field DMG, and the Hydro Resonance increases team max HP—further enhancing Neuvillette’s output.
Kazuha handles crowd control, DMG boosts, and resistance reduction. He groups enemies for Neuvillette's wide attacks, spreads Hydro/Electro to trigger 4-piece Viridescent Venerer (reducing 20% resistance to the spread element), and boosts corresponding elemental DMG via his talent (0.04% per Elemental Mastery).
Team Rotation:
Start with Neuvillette using Elemental Skill to apply Hydro and spawn "Source Water Droplets." Switch to Furina, use her Elemental Skill to summon "Salon Members" for sustained Hydro application, then activate her Burst "Grand Banquet" to max out "Atmosphere" for high DMG boosts. Next, Kazuha spreads Hydro to reduce resistance. Then Ineffa uses her Elemental Skill to apply Electro, triggering enhanced Lunar Electro-Charged Reactions while her shield ensures survival. Finally, Neuvillette absorbs "Source Water Droplets" to charge quickly, dealing massive Hydro DMG under Furina's buffs, Kazuha's resistance reduction, and Lunar Electro-Charged Reaction boosts. Refresh skills in rotation to maintain effects.
Overall, the team synergizes with "stable mechanics + stacked buffs + smooth crowd control + survival," letting Neuvillette safely deal sustained damage with fluid rotations and high damage ceilings.

Now, let's take a look at the lower half.

Lower Half: Mavuika-Centered Team

Mavuika + Citlali + Xilonen + Bennett
Mavuika, the team’s burst-focused quick-swap main DPS, excels against single bosses with explosive output. At C0, she relies on Xilonen and Citlali to build "Battle Will," focusing on Melt reactions here for top-tier DPS per rotation.
Xilonen reduces resistance and aids Battle Will generation. Her Elemental Skill and Normal Attacks build Mavuika's Battle Will; she also lowers enemies'Pyro resistance to boost Mavuika's damage, while her Burst provides healing to optimize the output environment.
Citlali doubles as Cryo applicator and shield provider. Her Elemental Skill and Burst quickly apply Cryo to trigger Melt with Mavuika's Pyro, doubling damage. Her skills generate shields for survival and error tolerance; she also consumes Night Soul to restore Mavuika's Battle Will, speeding up her Burst rotation.
Bennett is a powerhouse support—his Burst grants massive ATK buffs and healing, drastically enhancing team survival and output. He’s irreplaceable in Pyro DPS teams.
Team Rotation:
Start with Mavuika using Elemental Skill to apply Pyro. Switch to Xilonen, use her Elemental Skill and Normal Attacks to build Mavuika's Battle Will (use her Burst if needed). Next, Bennett uses his Elemental Skill + Burst for team ATK buffs. Then Citlali uses her Elemental Skill to clear Pyro and generate a shield, followed by her Burst to strengthen Cryo application and create an ice storm. Finally, Mavuika re-enters, uses her Burst to enter "Furnace of Life and Death" state, and holds Charged Attacks to deal sustained damage via Melt reactions.
The team revolves around Mavuika's output, with Xilonen and Citlali supporting Battle Will and reactions, and Bennett ensuring survival and buffs. Their tight synergy makes them strong against both single bosses and crowds.
| Conclusion
This Abyss leverages Hydro and Electro buffs to let Ineffa and Neuvillette's team shatter mechanics like the Last Tlaloque via Lunar Electro-Charged Reactions. Paired with Furina's buffs and Kazuha's crowd control/resistance reduction, output and survival are maxed.
The lower half uses Night Soul buffs to let Mavuika's Natlan team dominate foes via Melt reactions and Battle Will, with smooth rotations ensured by Bennett and Citlali. Both teams perfectly counter mechanics and maximize damage.
Finally, may all travelers clear this Abyss smoothly and claim all rewards quickly!
Want to get more Primogem? TOPUPlive offers a safe and discounted way for genshin top up. Enjoy:
✅ Official partner with secure transactions
✅ Exclusive discounts on primogem packages
✅ Instant delivery to your account
✅ 24/7 customer support
Get safe, instant, discounted top-ups with 12% off all games ( for user users) or 10% off using blog code:topupliveblog. Save now!