


Blood Strike Best Settings 2026: Best Sensitivity, Graphics, HUD & Controls

2026-10-30 16:50:48
Finding the best settings in Blood Strike can make a noticeable difference in aim accuracy, recoil control, movement, and overall performance. Whether you play on Android, iOS, or PC, the right setup should prioritize smooth FPS, responsive controls, and clear enemy visibility. This guide covers the recommended Blood Strike settings for competitive matches, along with practical adjustments for different devices and playstyles.
For a closer look at the Halloween event, check out our guide to 👉 Blood Strike Halloween 2026: Nightmare Trial, Free Rewards & Skins for the latest event details, free rewards, and limited-time cosmetics.
If you want to unlock more Strikers or purchase in-game resources, you can also check out Blood Strike top-up offers on TOPUPlive.



100+5 Golds


300+20 Golds

500+40 Golds

1000+100 Golds

▍Best Blood Strike Settings for 2026 at a Glance
There is no single configuration that works perfectly for every player. However, competitive players should generally prioritize stable frame rates, responsive aiming, and a clean interface over maximum visual quality.
Here is a recommended starting setup for mobile players:
Setting | Recommended Value |
|---|---|
Graphics Quality | Medium or High |
FPS | Extreme / Highest Stable Option |
Resolution | High or Ultra |
First-Person FOV | 100–120 |
FOV Style | Associated |
Aim Assist | Expert |
ADS Mode | Hold |
Auto Fire | Off |
Fire Rotates Camera | Off |
Auto Sprint | Off |
Auto Jump Over | Off |
Crouch Mode | Hold |
Music Volume | 0% |
Sound Effects | 100% |
These settings are a competitive starting point rather than mandatory values. If your device struggles to maintain stable performance, reduce graphics quality before sacrificing frame rate.
▍Best Blood Strike Graphics Settings
Graphics settings affect more than visual quality. They also influence how smoothly you can track enemies, react to sudden encounters, and control your weapon during intense fights.
For competitive gameplay, prioritize stable FPS and clear visibility.
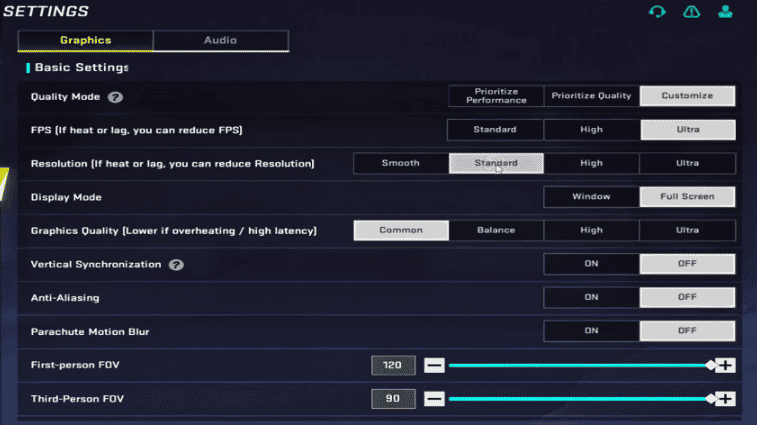
Graphics Setting | Recommended Value | Reason |
|---|---|---|
Quality Mode | Customize | Allows individual adjustments |
FPS | Extreme / Highest Stable Option | Improves aiming and movement responsiveness |
Resolution | High / Ultra | Keeps enemies and surroundings clear |
Graphics Quality | Medium / High | Balances visibility and performance |
First-Person FOV | 100–120 | Provides a wider field of view |
FOV Style | Associated | Maintains more peripheral visibility while aiming |
Display Weapon Customization | Optional | Personal visual preference |
Filter | Vivid | Can improve visual contrast |
Best Graphics Settings for Low-End Devices
If you experience frame drops, overheating, or stuttering, use the following adjustments:
- Set Graphics Quality to Low or Medium.
- Choose the highest FPS option your device can maintain consistently.
- Reduce unnecessary visual effects and shadows if those options are available.
- Close background applications before launching the game.
- Avoid playing while your phone is overheating.
A stable 60 FPS experience is generally better than an unstable higher frame rate. Players with high-refresh-rate devices should use higher FPS options only when performance remains consistent.
Best FOV Settings

A First-Person FOV between 100 and 120 is a useful starting range for competitive mobile players. A wider FOV helps you monitor more of your surroundings, although distant enemies may appear smaller.
If you find it difficult to track targets at long range, try lowering FOV slightly and compare the results in the training area.
▍Best Blood Strike Sensitivity Settings
Sensitivity is one of the most important parts of a competitive setup. It determines how quickly your camera moves when you swipe and how accurately you can track enemies while firing.
Instead of copying another player's complete sensitivity profile, start with the following recommended ranges and adjust them according to your screen size and aiming style.
Best Mobile Sensitivity Settings
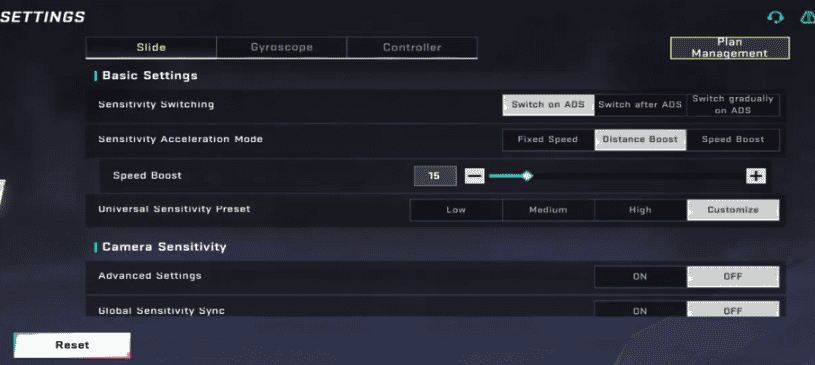
Sensitivity Setting | Recommended Starting Range |
|---|---|
Camera Sensitivity (Phone) | 60–80% |
Camera Sensitivity (Tablet) | 45–65% |
Firing Sensitivity | 15–25% lower than Camera |
Iron Sight / Red Dot | Close to Camera Sensitivity |
2x–4x Scope | Lower than Red Dot |
6x–8x Scope | Lowest Scope Sensitivity |
Gyroscope | Around 20–30% lower than Camera |
These are starting ranges, not universal pro settings. Larger screens generally require less sensitivity because your fingers have more room to travel.
Best Gyroscope Settings
Gyroscope aiming allows players to adjust their crosshair by physically tilting their device. It can be particularly useful for controlling recoil and making small aiming corrections.
Gyroscope Setting | Recommendation |
|---|---|
Gyroscope Mode | Optional; start with ADS-only if available |
Gyroscope Sensitivity | Around 20–30% below Camera Sensitivity |
Gyroscope Deadzone | Increase until unwanted drift disappears |
If you are new to gyro aiming, start with a moderate sensitivity and use it for small corrections rather than attempting to control every movement with your device.
Experienced players can gradually increase gyro sensitivity to improve recoil control and tracking. If your crosshair moves even when your phone is stationary, adjust the deadzone or recalibrate the gyroscope.
Best Sensitivity Settings for PC Players
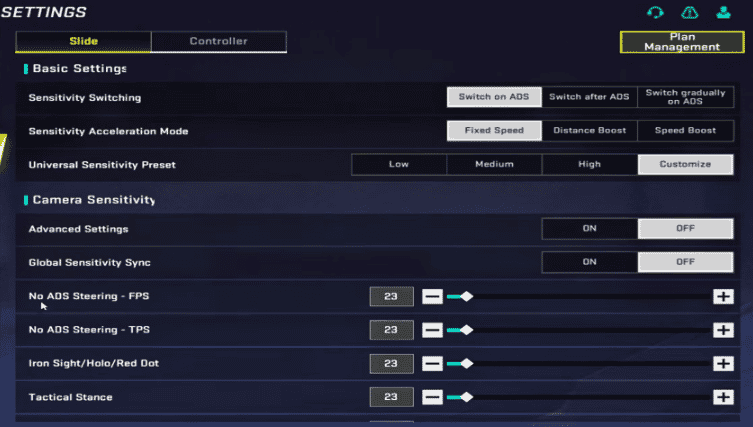
PC players should use a different approach because mouse sensitivity depends on both DPI and the in-game sensitivity setting.
Setting | Recommended Starting Point |
|---|---|
Mouse DPI | 800 |
Mouse Acceleration | Off |
In-Game Sensitivity | Start with a moderate value |
Scope Sensitivity | Adjust separately |
Windows Pointer Acceleration | Off |
An 800 DPI mouse setting is a reasonable starting point, but your final in-game sensitivity depends on your mouse, available desk space, and preferred aiming style.
Avoid changing DPI and in-game sensitivity simultaneously. Adjust one setting at a time so you can identify which change improves your aim.
▍Best Blood Strike Controls Settings
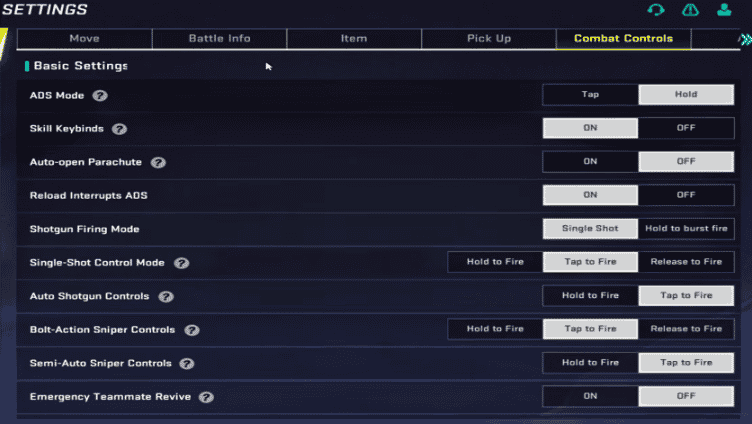
A competitive control setup should allow you to aim, shoot, move, jump, and crouch without unnecessary finger movement.
The following settings provide a useful starting point for mobile players:
Control Setting | Recommended Value |
|---|---|
ADS Mode | Hold |
Auto Fire | Off |
Aim Assist | Expert |
Left Fire Button | On |
Right Fire Button | On |
Fire Rotates Camera | Off |
Auto Sprint | Off |
Auto Jump Over | Off |
Crouch Mode | Hold |
Mini-map Rotation | Fixed |
Some control options may differ between mobile and PC versions or change with game updates. Check your current in-game settings menu before applying the configuration.
▍Best Blood Strike HUD Layout
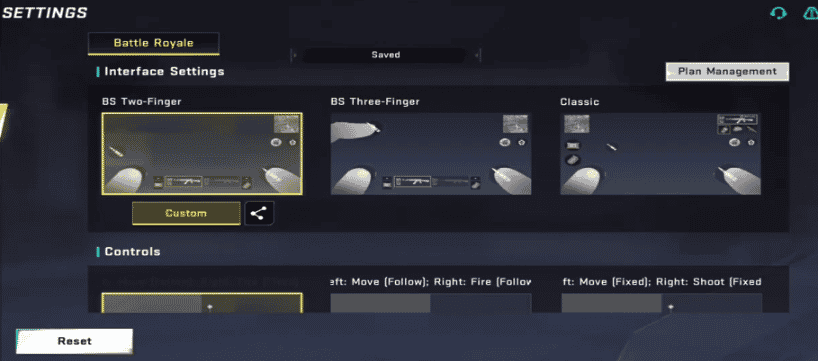
Your HUD layout determines how comfortably you can perform multiple actions during a fight. A poorly positioned button can make it harder to aim, move, or react quickly.
For mobile players, the best layout depends mainly on how many fingers you use.
Two-Finger HUD Layout
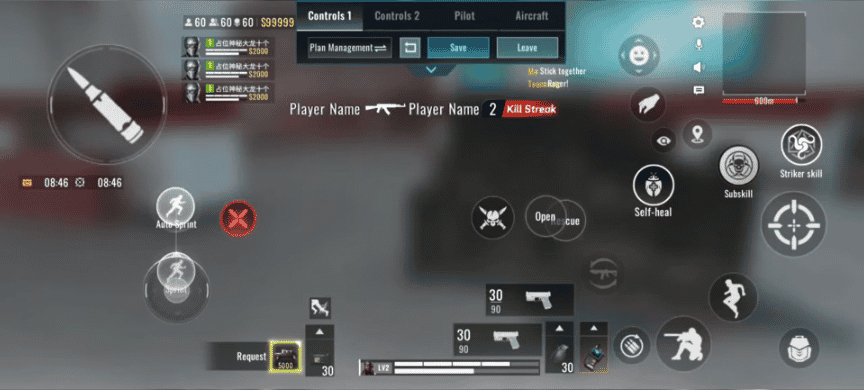
A two-finger layout is suitable for beginners who prefer a simple control scheme.
- Left thumb: Movement joystick.
- Right thumb: Camera movement, aiming, and shooting.
- Keep jump, crouch, reload, and weapon-switch buttons within easy reach of your right thumb.
- Make the fire and ADS buttons large enough to press consistently without covering important parts of the screen.
This layout is easy to learn, but performing several actions simultaneously can be difficult.
Three-Finger Claw HUD Layout
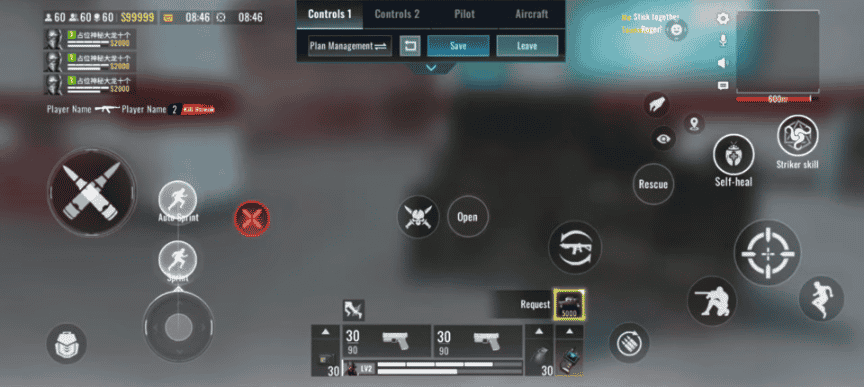
A three-finger layout provides more flexibility for aggressive players.
Button | Suggested Position |
|---|---|
Movement Joystick | Bottom Left |
Left Fire Button | Upper Left |
ADS Button | Upper Right |
Jump Button | Right Side |
Crouch Button | Lower Right |
Reload Button | Near the Right Thumb |
Use your left thumb for movement, left index finger for firing, and right thumb for aiming and other actions.
This layout makes it easier to shoot while moving or jumping without sacrificing camera control.
Four-Finger Claw HUD Layout
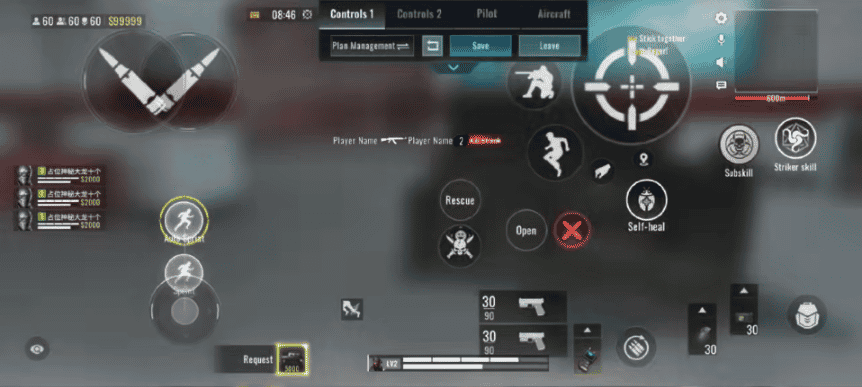
Experienced players can use a four-finger claw layout to perform more actions simultaneously.
A common arrangement is:
- Left thumb: Movement.
- Left index finger: Fire.
- Right index finger: ADS and additional combat actions.
- Right thumb: Camera control and smaller buttons.
The main advantage is that aiming, shooting, jumping, and crouching become easier to combine. However, four-finger controls require practice, so beginners should not switch immediately if they are still uncomfortable with basic movement.
HUD Customization Tips
- Keep frequently used buttons within comfortable finger reach.
- Avoid placing important buttons over the center of your screen.
- Use larger buttons for actions that require quick reactions.
- Adjust transparency to maintain a clear view of enemies.
- Save your layout before making major changes so you can restore it if necessary.
▍How to Find Your Best Blood Strike Settings
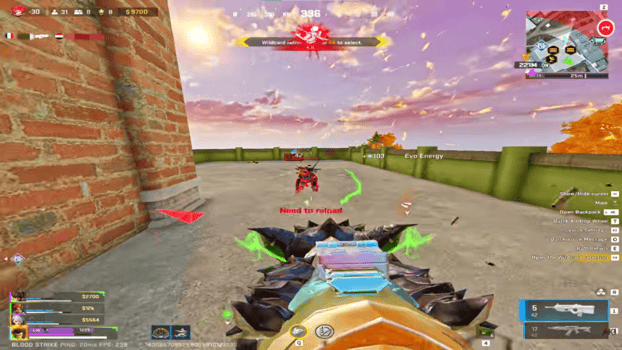
Even a well-designed configuration needs personal adjustment. The most effective way to find your ideal setup is to test each setting systematically.
Step 1: Set Your Graphics First
Choose a graphics quality and FPS combination that your device can maintain consistently. Avoid changing sensitivity before fixing major performance problems.
Step 2: Adjust Camera Sensitivity
Enter the training area and practice turning toward targets from different directions. Increase sensitivity if you cannot turn quickly enough, or reduce it if your crosshair frequently moves past the target.
Step 3: Tune Firing and Scope Sensitivity
Practice spraying with your preferred weapons. If your aim becomes difficult to control while firing, lower firing sensitivity slightly. Then test each scope separately.
Step 4: Test Your HUD
Practice moving, jumping, crouching, aiming, and shooting at the same time. If you repeatedly miss a button or accidentally press another one, adjust its size or position.
Step 5: Test Your Setup in Real Matches
Play several matches using the same configuration. Pay attention to whether your aim feels consistent, your FPS remains stable, and your controls are comfortable.
Avoid changing several settings after every match. Make one adjustment at a time so you can identify what actually improves your performance.
▍Conclusion
The best Blood Strike settings combine stable FPS, comfortable sensitivity, responsive controls, and a clean HUD layout. Start with the recommended configurations in this guide, then adjust them according to your device and playstyle. Consistency matters more than copying another player's settings.
For more ways to earn rewards and climb the ranks, 👉Blood Strike Codes can help you.
Looking to unlock more content and strengthen your in-game collection? Visit TOPUPlive for convenient Blood Strike top-up options and more gaming deals.

Sana Li
game writer
I focus on writing guides, tips, and strategy content for popular games. I specialize in breaking down complex systems and economy mechanics, helping players save time and currency while staying ahead of the latest updates and limited-time events.
Related products

Related News

Monster Hunter Outlanders Tier List: Best Adventurers and Team Compositions
Monster Hunter Outlanders Codes (November 2026): All Active Codes and How to Redeem
Honkai: Star Rail Version 4.7 Livestream Summary: Banners, Aha, Free Rewards, and Events
NTE Version 1.5 Livestream Summary: New Characters, Banners, Story, Events, and Codes
TOPUPlive Halloween 2026 Events: Free Monthly Passes and Gaming Currency
Monster Hunter Outlanders Top Up Guide: Price, Methods & How to Top Up Crimson Crest Coins Safely & Cheaply
Where Winds Meet Redeem Codes (November 2026): Active Codes and Free Rewards
Call of Duty Mobile Redeem Codes November 2026