
Greeting Traveller!
November is ending. Did you get a full-star clear of the Spiral Abyss this cycle? If you haven't, don't worry; we will provide you with a detailed guide to achieve a full-star completion!
The difficulty of the Lunar II Abyss is on the higher side. The main challenge is split: half of the content requires specialized mechanics, while the other half is a severe test of your damage output. This may pose a certain challenge for players who have not yet acquired characters from the game's newest system.
Of course, if you are looking for a more affordable way to top up,get ready for everything has to offer! Visit TOPUPlive for up to 28% off on your game top-ups and prepare for your next adventure!

| Genshin 6.1 Spiral Abyss Floor 12 BuffLunar II
Damage Requirement:
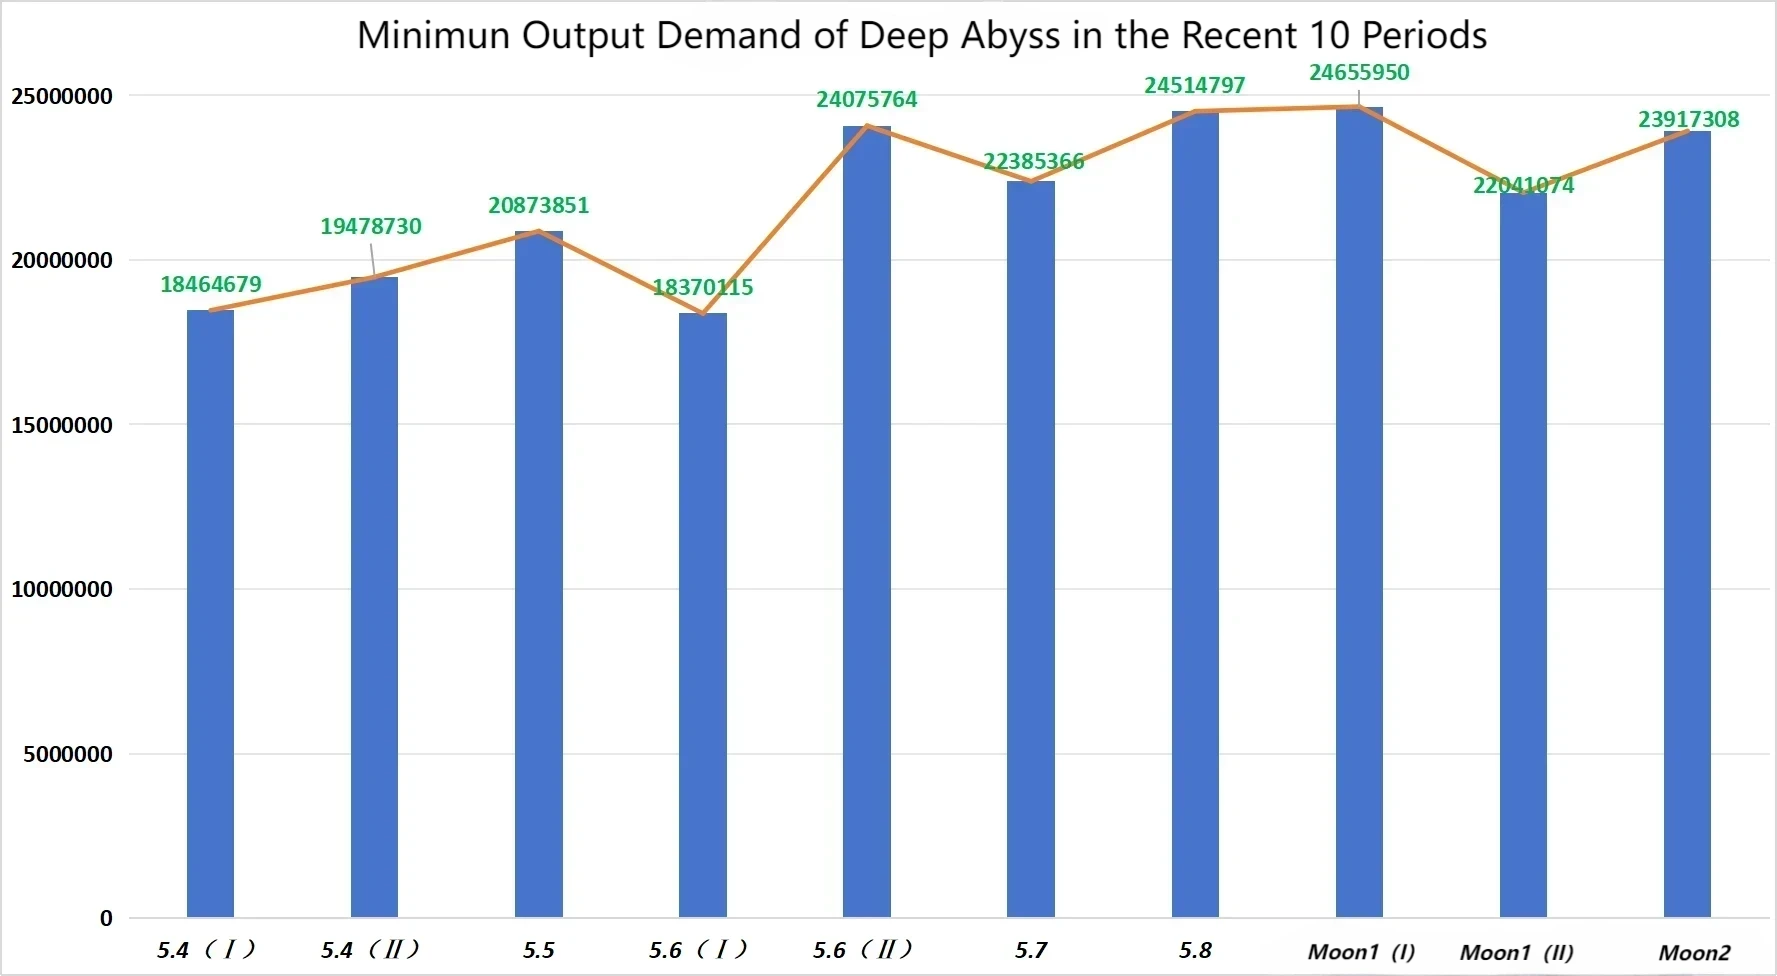
The minimum damage required to clear the Lunar II Abyss has increased significantly compared to the previous cycle.
Lunar II Abyssal Moon Blessing / Ley Line Disorde
Blessing of the Welkin Moon
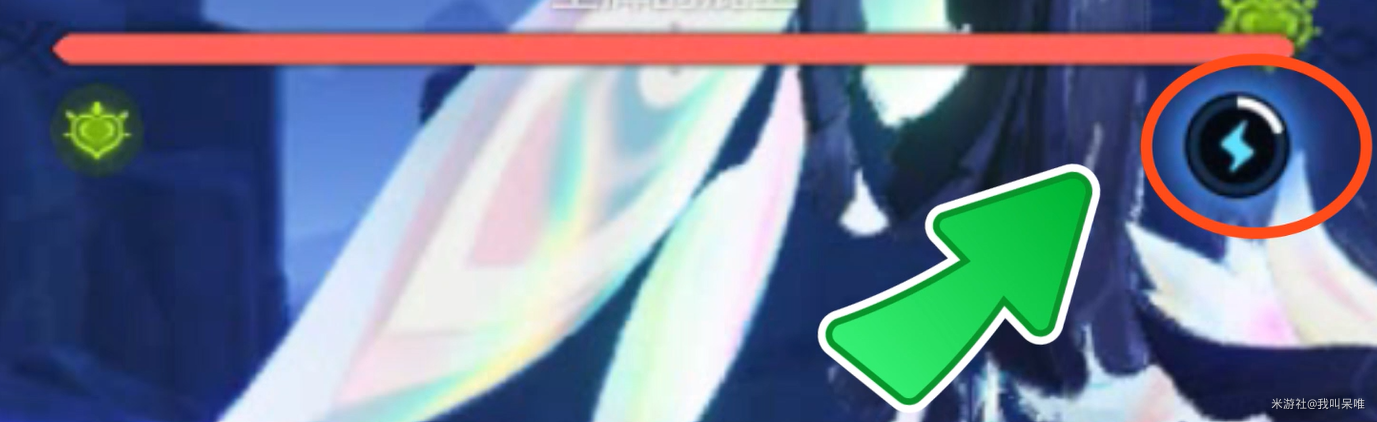
When the value of the active character's Bond of Life increases or decreases, an Anemo shockwave will be unleashed, dealing True Damage to nearby enemies.
Therefore, using characters that utilize the Bond of Life mechanic can alleviate some of the damage pressure. However, the general utility of this Blessing is quite low.
Ley Line Disorde
First Half:
The damage dealt by characters' Bloom reaction is increased by 200%, and the damage dealt by the Lunar Bloom reaction is increased by 75%.
Second Half:
The Pyro damage dealt by characters through Normal Attacks is increased by 75%.
Players can clearly infer the recommended characters and teams for this phase based directly on the Ley Line Disorders.
Strategy Requirements
First Half:
The environment in this half is primarily focused on single-target combat. Therefore, our teams require relatively strong single-target damage capabilities.
The Boss in 12-1 continuously spawns new seeds, which necessitates a certain degree of AoE capability.
The mechanism of the 12-2 Boss requires high-frequency, multi-core teams to overcome, or alternatively, the use of teams optimized for the Lunar Reaction.
In 12-3, utilizing a Lunar Zenith Team (two Nod-Krai characters) can greatly reduce the damage pressure!
Second Half:
This half also requires single-target damage output, as the enemies are essentially very tanky, stationary targets.
For countermeasures in Chamber 3, utilizing the Night Soul buff or characters who can apply Resistance Shred will be more effective in dealing with the Sourcewater Mechanical Array.
Elemental Requirements
First Half :
In this phase, we recommend Dendro + Hydro elements. Using the Bloom or Lunar Bloom reactions is necessary to break the mechanism of the Boss in Chamber 1. Other elements are neither significantly restricted nor particularly favored.
Second Half :
We recommend the Pyro element. Pyro is effective and highly beneficial for breaking the mechanisms of the Bosses in Chamber 1 and Chamber 2.
Of course, you can also consider bringing a character with the Ousia alignment, such as Furina, to directly break the mechanism of the 12-1 leader.
There is high Anemo resistance in Chamber 1, and high Cryo resistance in both Chamber 1 and Chamber 3. Therefore, Anemo DPS and Cryo DPS characters are not recommended, unless you have a character like Ayaka.
Chamber 2 has high Dendro resistance, so Dendro DPS characters are not recommended if your configuration is not strong enough.
Survival Requirements
Regarding the boosted characters in the current Prayer (Wish) banners near the Abyss, the Lunar I Abyss is highly compatible with Nefer, Furina, Arlecchino, and Zhongli.
Nefer is a Dendro Main DPS and the Main DPS for the Lunar Bloom reaction, making him clearly recommended for the First Half.
Furina is a highly versatile Hydro off-field support, who performs well in both the First Half and the Second Half. In the Second Half, she can also utilize her Ousia attack to break mechanisms.
Arlecchino is a Pyro Main DPS who utilizes the Bond of Life mechanic. Using her in the Second Half perfectly adapts to the current Ley Line Disorder. While using her in the First Half is not impossible, the team composition would be unconventional and require a certain level of investment.
Zhongli offers reassuring shield strength and is recommended for the Second Half."
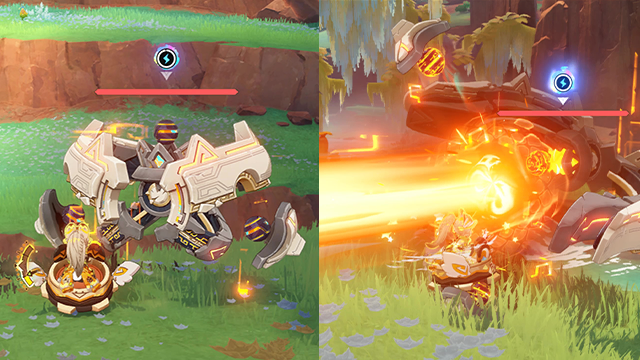
| Genshin 6.1 Lunar II Spiral Abyss Floor 12 Enemies
First Chamber
- Upper Half:
Wave 1:
Sternshield Crab X 1
While protected by a Pyro Elemental Shield, it possesses 70% All Resistance. Its resistance returns to normal once the shield is destroyed.
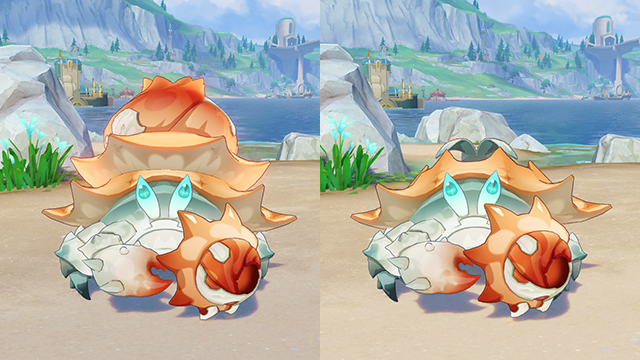
Wave 2:
[Local Legend] Crab Tsar X 1
[Abyss Specialization] Immediately takes flight and activates a shield at the start.
After the BOSS takes flight, it summons a large number of Rockfond Seeds. If these seeds are not transformed within a certain time limit, they will deal high damage to your active characters

- Lower Half:
Wave 1:
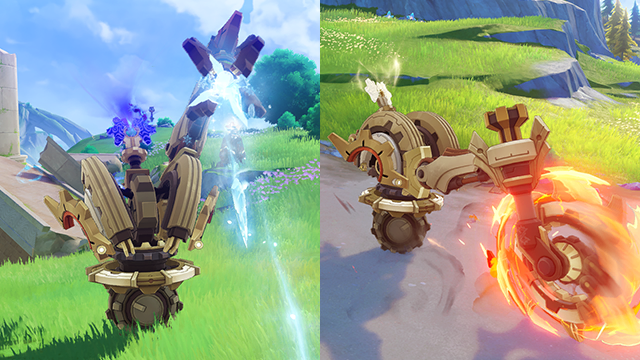
Suppression Specialist Mek - Ousia Alignment X 1
A standard Fontaine Mek that performs ranged Dendro attacks.
Wave 2:
Construction Specialist Mek - Pneuma Alignment X 1
A large Fontaine Mek that performs ranged Cryo attacks.
Wave 3:
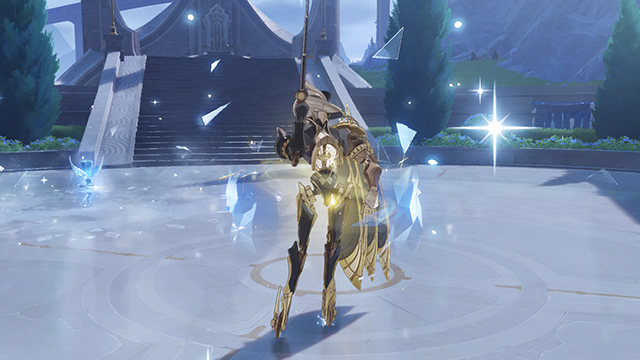
Coppelius's Judgment (Icewind Suite) X 1
Note the following key points:
Cryo and Anemo Resistance: 70%. Anemo DPS and Cryo DPS characters are not recommended.
Mechanism: It immediately enters the Climax phase at the start of the performance, summoning an Ousia-aligned Cryo Shield. This occurs three times and can be interrupted by Pneuma-aligned attacks.
Output/Damage: It has very strong damage output, which can easily cause the player's character to be defeated quickly.
Second Chamber
- Upper Half:
Wave 1:
Frostnight Herra X 1
[Abyss Specialization]: Immediately converts its state at the start.
The BOSS's attack skill wind-ups are relatively long and easy to dodge; the primary focus is on breaking its mechanism.
The BOSS immediately undergoes a form transformation, increasing its All Resistance by 120%.
After this, the BOSS enters the "Black Horse" state, which persists until the mechanism is broken.
Players need 50 attacks to fill a progress bar, which forces the BOSS out of the Black Horse state and into a paralyzed/vulnerable state.
During this time, it will record the element that deals the highest amount of damage. Once we break the Black Horse state, the Boss will transform into a Slime of that corresponding element, becoming immune to that element's damage and gaining a permanent elemental application.
- Lower Half:
Wave 1:
Gluttonous Yumkasaur Mountain King X 1
It has 70% Dendro Resistance throughout the entire encounter, which is quite high, and possesses a very high HP pool. Therefore, using Dendro Main DPS characters is not recommended.
Its damage output is also quite strong, so it is best to bring a Survival Support character (like a shielder or healer).
Core Mechanism:
Every so often, it summons 3 Flamegranate. The BOSS will swallow these fruits, then spit fire, dealing massive damage. The more fruits it swallows, the higher the damage.
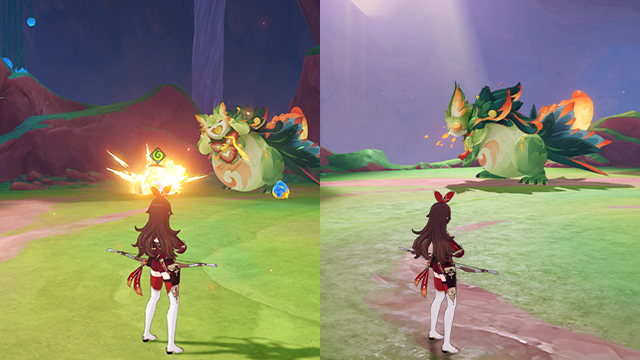
Attacking the Flamegranate with a Pyro element can cause them to ignite. After being swallowed by the BOSS, each fruit will deal damage equal to 5% of its Max HP to the BOSS. The Flamegranate also deal significant damage when they explode.
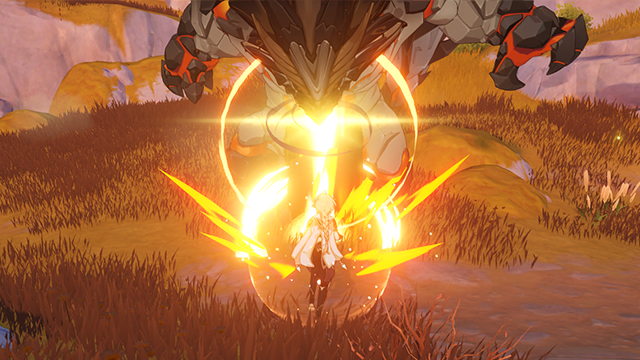
Third Chamber
- Upper Half:
Wave 1:
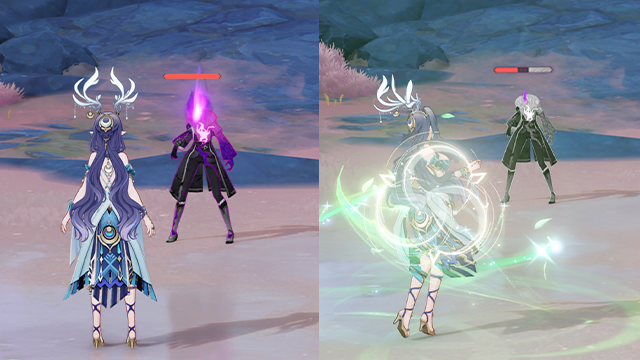
Wilderness Exile X 1
Wave 2:
Wilderness Hunter X 1
It does not die immediately when its HP drops to 0; it will recover to its Max HP after a period of time.
When its HP is reduced to 0, or when it is struck by an ability enhanced by the Lunar Zenith , it will enter a "Greyed-out" state.
During this "Greyed-out" state, your attacks can reduce its Max HP limit.
Each time its HP drops to 0, a certain amount of its Max HP value is reduced.
The efficiency of Max HP reduction for Lunar Zenith Teams is 95%, while the reduction efficiency for non-Lunar Zenith Teams is 65%.
The enemy can only be defeated once its total Max HP limit has been fully reduced.
- Lower Half:
Wave 1:
Secret Source Automation: Hunter-Seeker X 1
It possesses 50% All Resistance in its normal state.
If there are characters nearby who are currently under the Night Soul buff, it will charge the BOSS's progress bar. The more characters with the Night Soul buff, the faster the bar fills.
Once the progress bar is full, its increased resistance will be removed.
Wave 2:
Primo Geovishap - Cryo Form X 1
It maintains 50% Geo Resistance throughout the entire encounter, along with 30% Physical Resistance and Cryo Resistance.
Core Mechanism:
After every 2-3 sets of attacks, the BOSS will unleash its Primordial Geo Spray, dealing massive damage.
Using a shield allows for a "shield counter". Specifically, Geo shields and Cryo shields will deal massive rebound damage to the BOSS and lower its resistance by 50% for 5 seconds. This period is a great opportunity for concentrated damage output.
| Genshin 6.1 Lunar Spiral Abyss Floor 12 Best Team Comps
- Upper Half:
For the First Half, it is recommended to bring characters with excellent single-target damage output. Concurrently, the team should possess some AoE Dendro and Hydro application capabilities. It is also highly recommended to prioritize characters related to the Lunar Reaction and Lunar Zenith mechanic to quickly break the mechanisms of the Frost-Woven Skybreaker Lord and the Wilderness Hunter. We recommend pairing teammates with a mix of different damage types, rather than focusing on a single element.
.png)
- Lower Half:
The first characters recommended, naturally, are those with excellent single-target damage output.
We prioritize Pyro characters to quickly break the mechanisms of the Bosses in Chambers 1 and 2. Alternatively, for the Boss in Chamber 1, you can consider using Pneuma-aligned characters for the countermeasure.
Secondly, Cryo and Geo shields are highly recommended, as they can guarantee survival while enabling the 'shield counter' against the Primo Geovishap in Chamber 3.
Cryo DPS and Anemo DPS characters are not recommended for use. If you insist on using them, it is advised to bring strong Resistance Shred support, such as a highly invested character like Ayaka.
(1).png)
| Conclusion
The overall difficulty of the Lunar II Abyss is on the higher side, posing a significant test to both character strength and team composition. Configuring your resources rationally is the first key to a smooth clear.
Want to get more Crystals and the latest game info? TOPUPlive offers a safe and discounted way for genshin top up. Enjoy:
✅ Official partner with secure transactions
✅ Exclusive discounts on Crystals packages
✅ Instant delivery to your account
✅ 24/7 customer support
Get safe, instant, discounted top-ups with 12% off all games ( for user users) or 10% off using blog code:topupliveblog. Save now!